
Upload files, such as documents, spreadsheets, images, videos, PDFs, and SCORM courses to the platform and share them with users and communities.
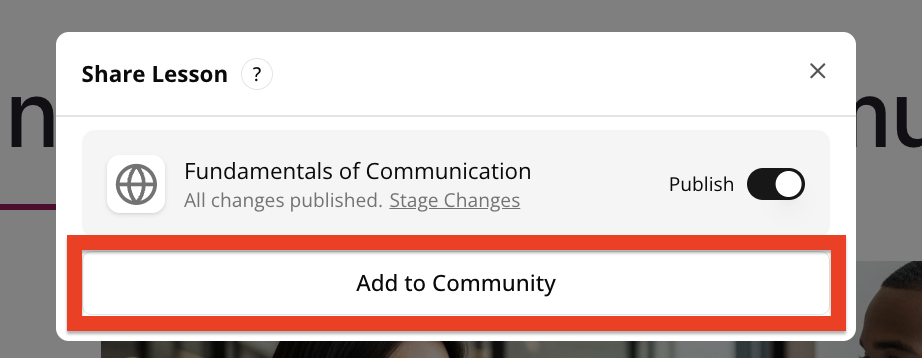
If you are using the Add to Community option in Course+ to publish a lesson to the platform, you will be taken directly to the Upload screen as part of the process.
If you are using the legacy version of the platform, see Creating content in the legacy UI.
To upload a file:
-
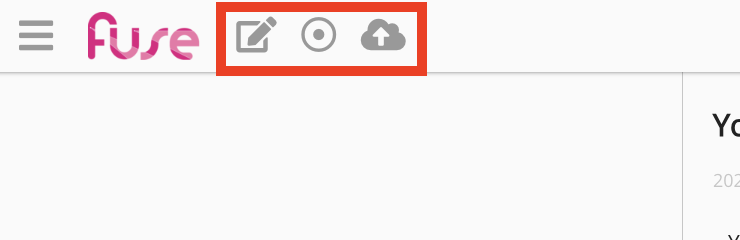
On the navigation, click Create > Upload.

-
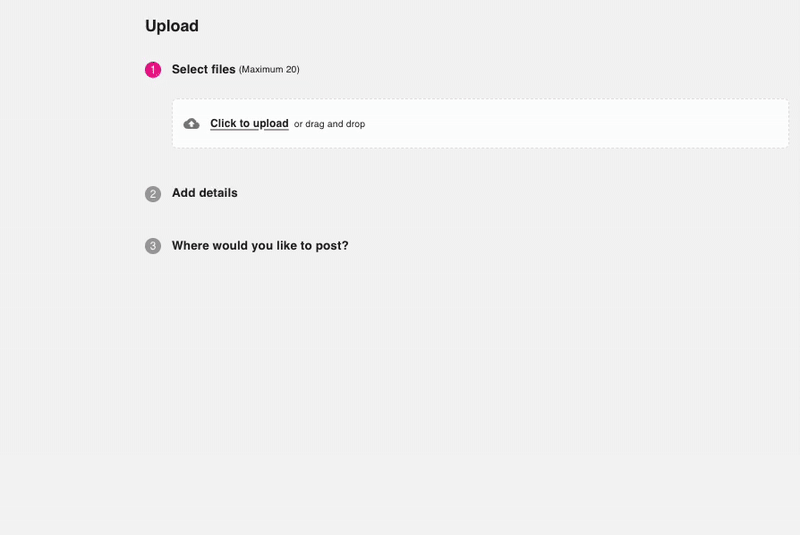
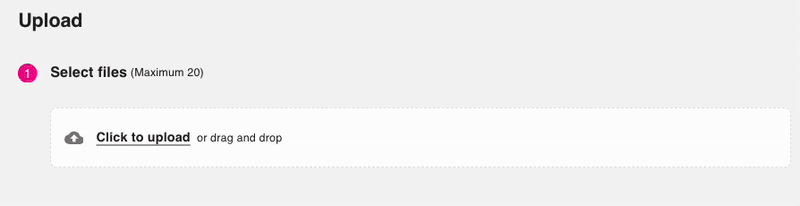
In the Select files section, add the files you wish to upload. You can upload a maximum of 10 files in each upload.
You can attach files in one of two ways:-
Click the Click to upload link and then browse to the files on your computer:
-
Drag and drop the files from your computer into the upload area:
The files are attached. The time it takes for files to attach can vary depending on how many are being attached and the file sizes.
-
-
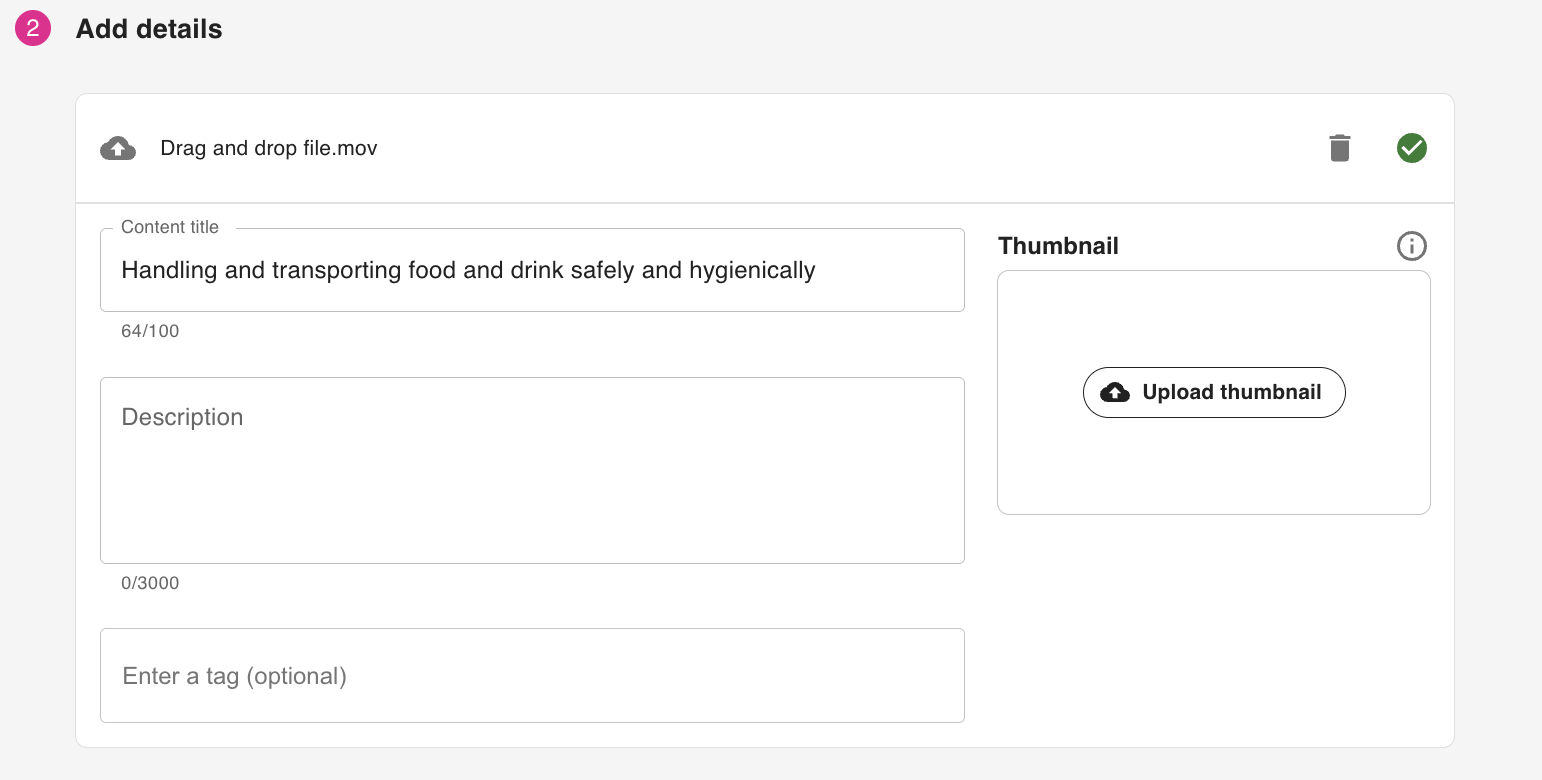
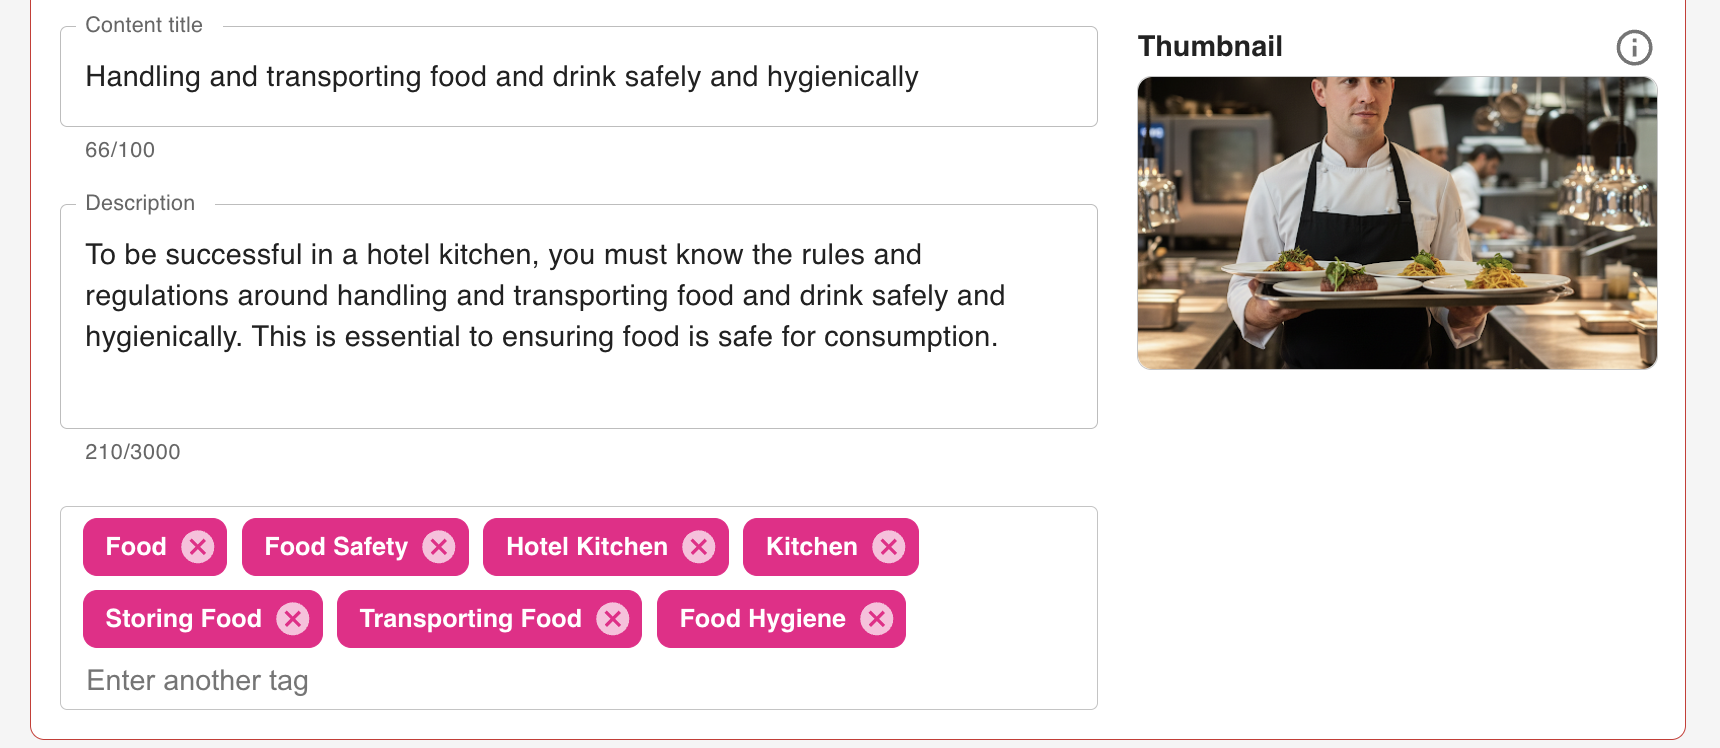
Add some details to each file you have uploaded - certain information, such as a title, is extracted from the file automatically based on the file name. You can adjust the title, as well as populate other key information, including:
-
The description: This helps the platform pick up the file and use it in keyword searches and in AI answers.
-
The thumbnail image: This helps the file stand out on the platform when viewed in search results, on widgets, and in feeds alongside other content items, and when added to and .
-
The tags: Tags allow the uploaded file to show up in recommendations underneath similarly tagged and related items of content in the platform and so that can be found easily in searches. For example, if the file relates to food safety preparation procedures, you might add tags for: “Food”, “Food Safety”, “Food Hygiene” and so on.
-
-
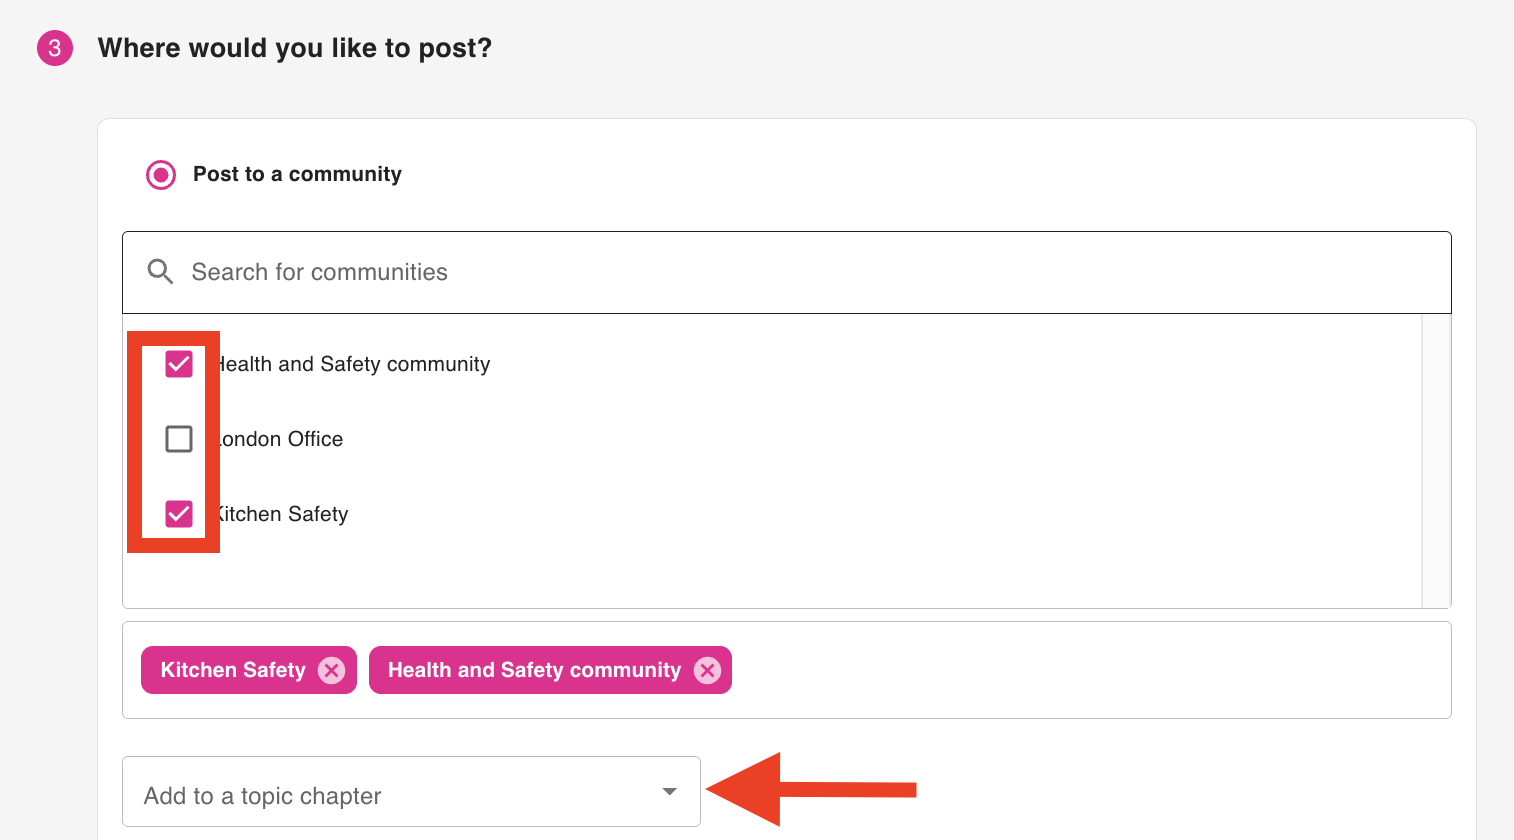
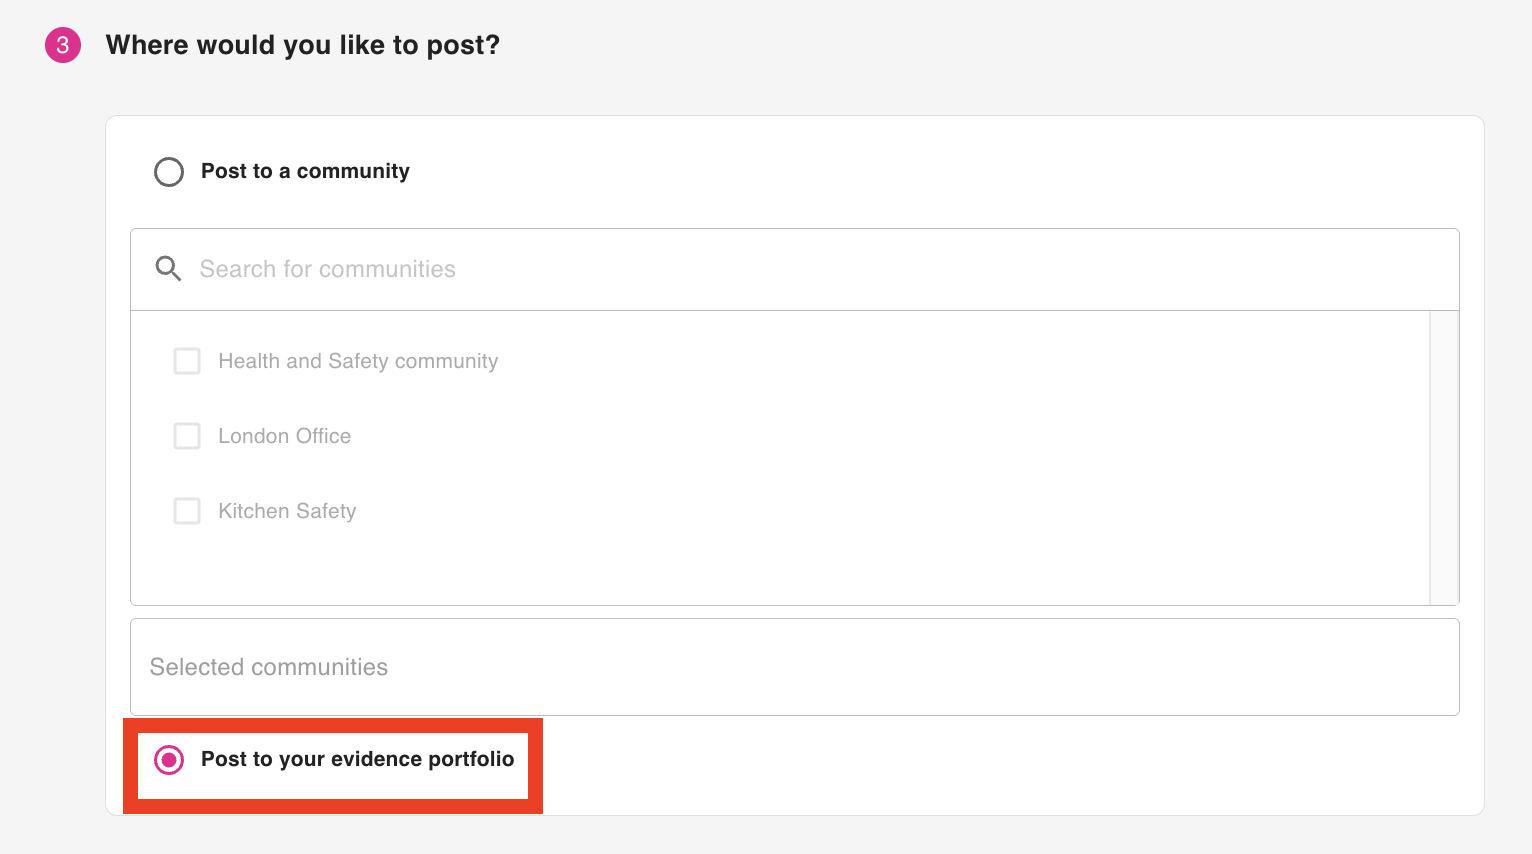
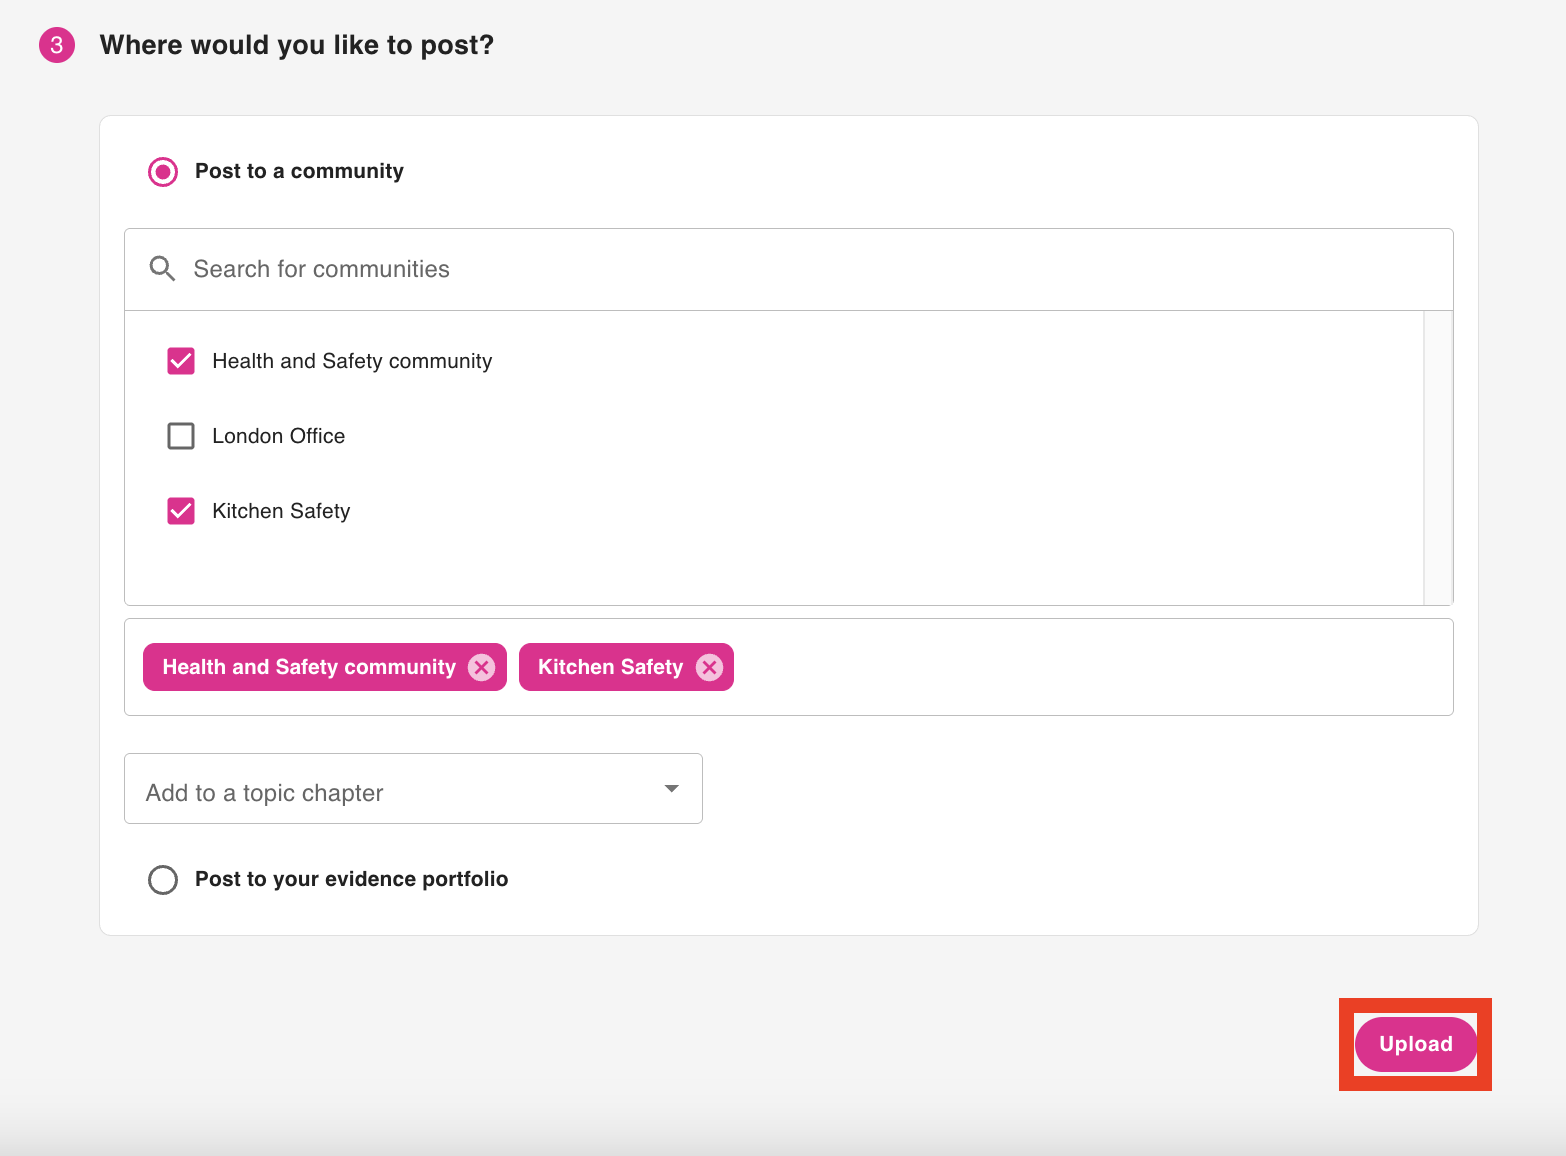
In the Where would you like to post? section, select where you would like to post the file.
You can select one of the following:-
Post to a community: Add the uploaded file to one or more communities, and optionally, you can add it to a chapter within an existing topic within a selected community. For example, you might want to add it to a chapter within a standalone or a topic that is part of a :
-
Post to your evidence portfolio: Select this option if you only want the file to be uploaded to your evidence portfolio. You might do this if you only want your manager to be able to see it first, perhaps because you would like them to review it before re-uploading it to the platform later on for others to consume. The evidence portfolio is a space in your profile which allows you to share content with your manager(s). If an item of content exists in the evidence portfolio, it is only visible to you and your manager(s).
-
-
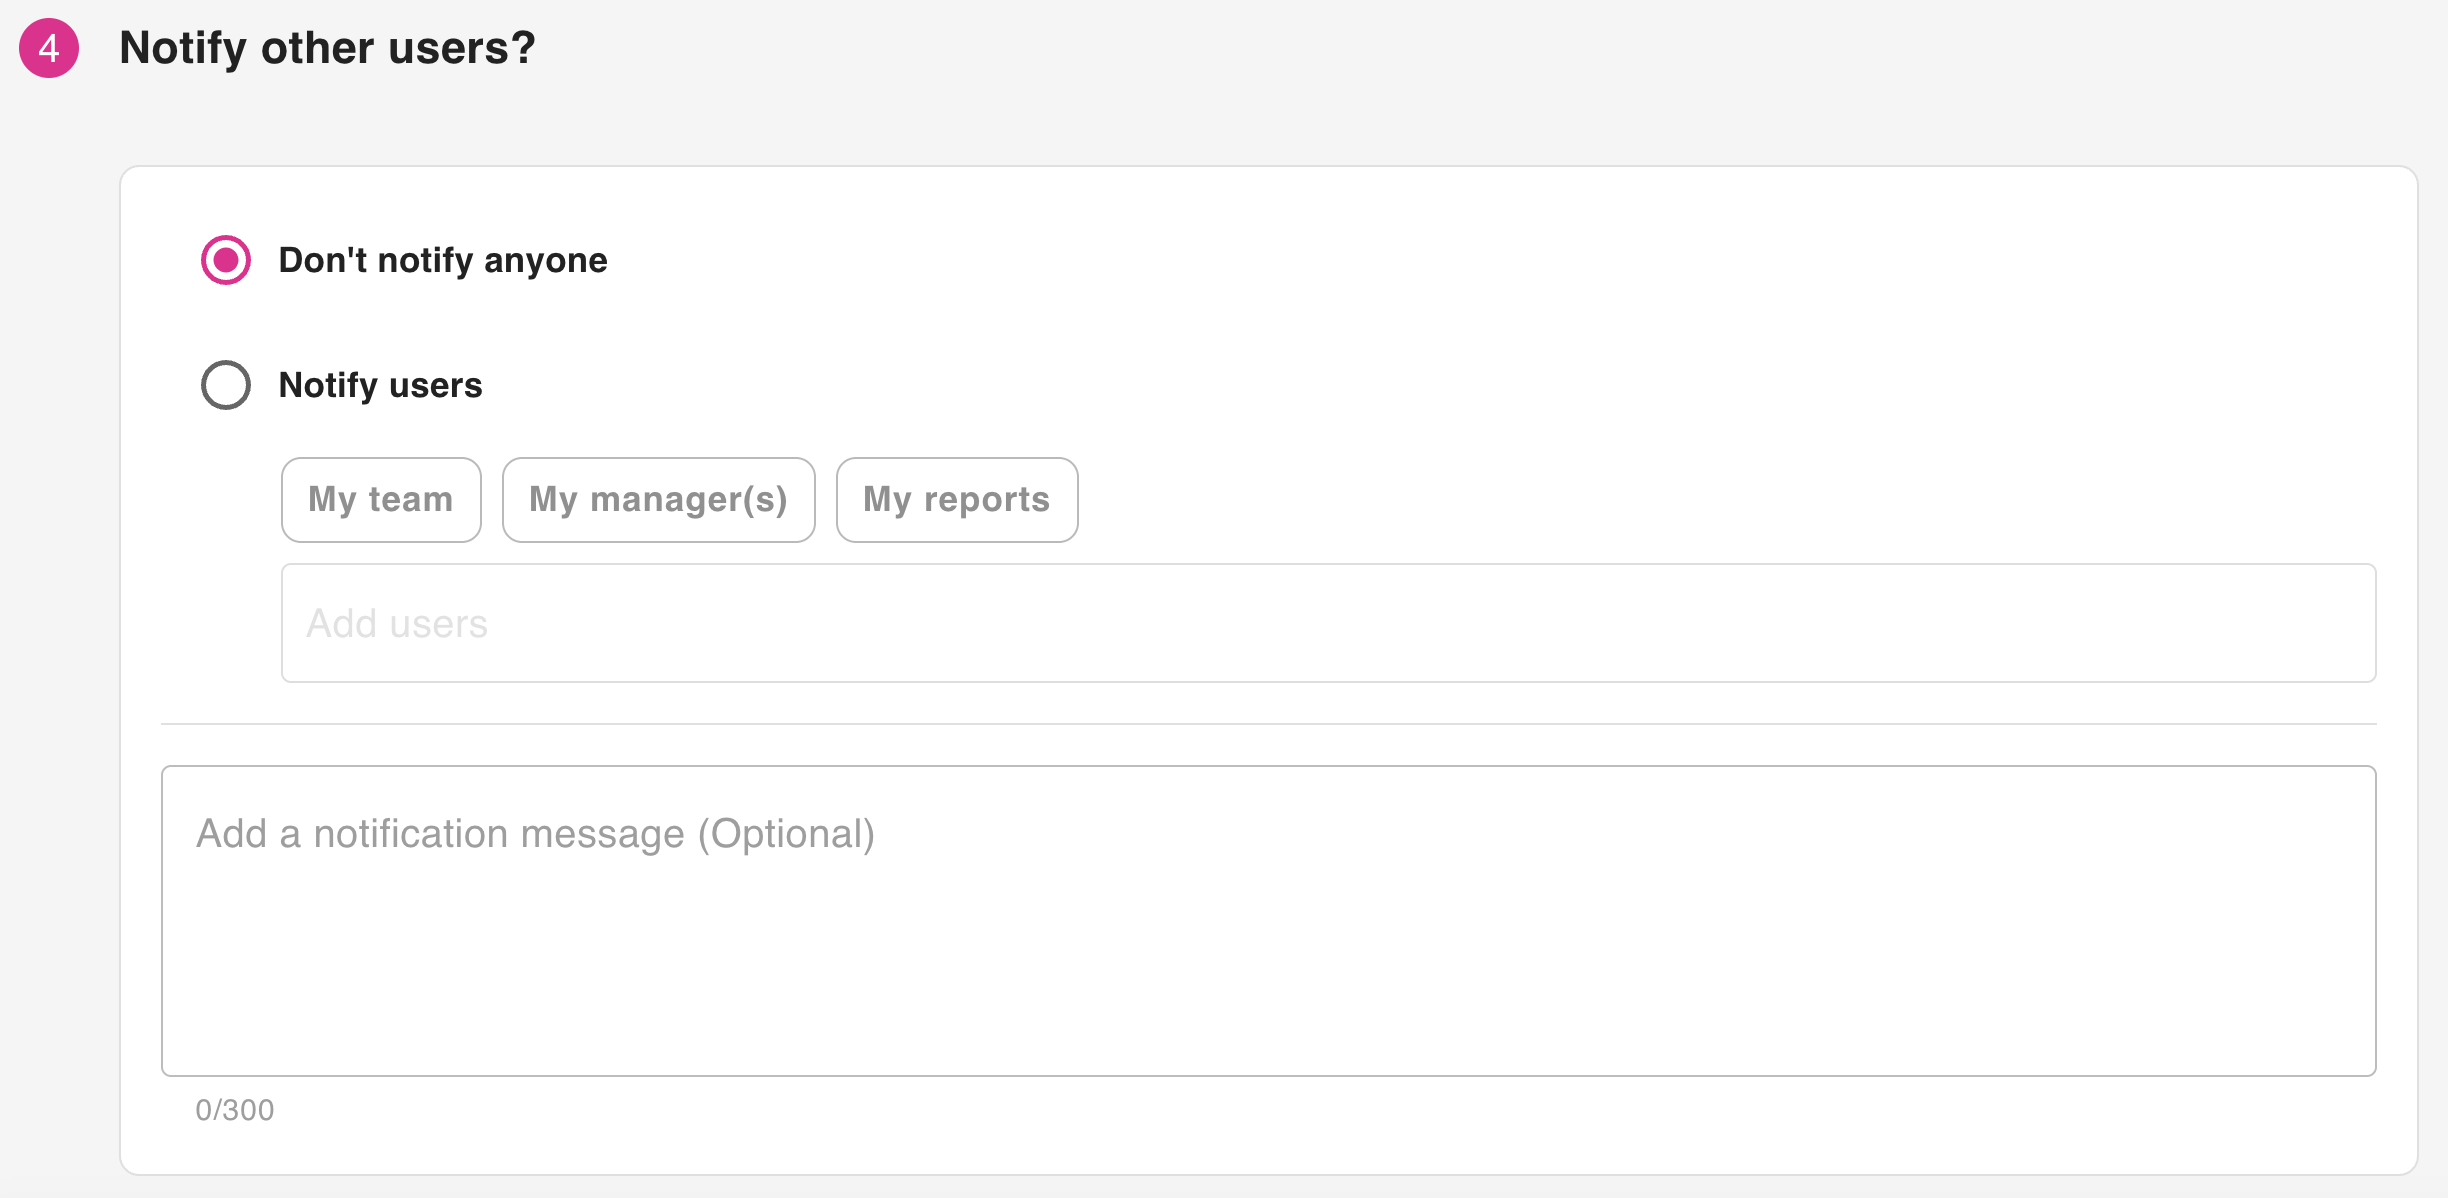
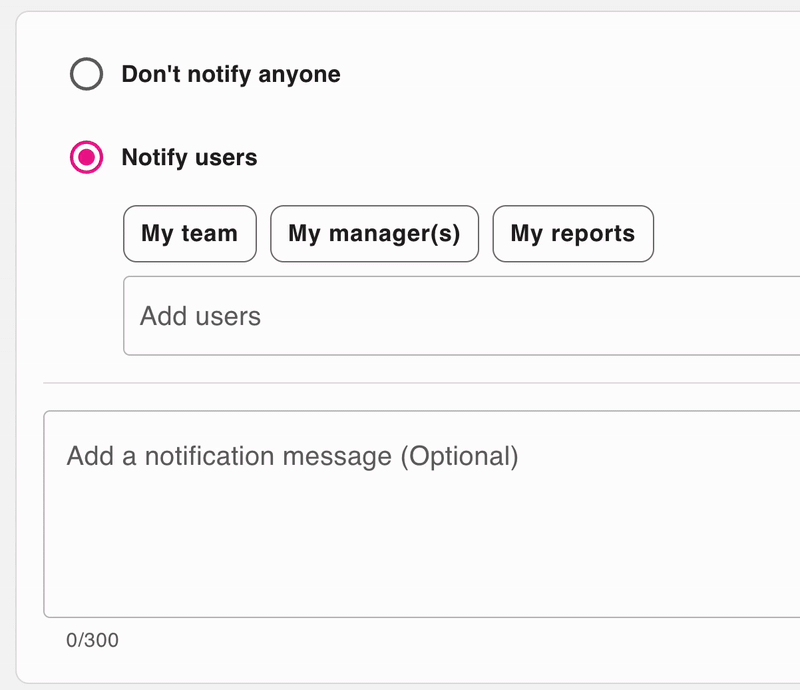
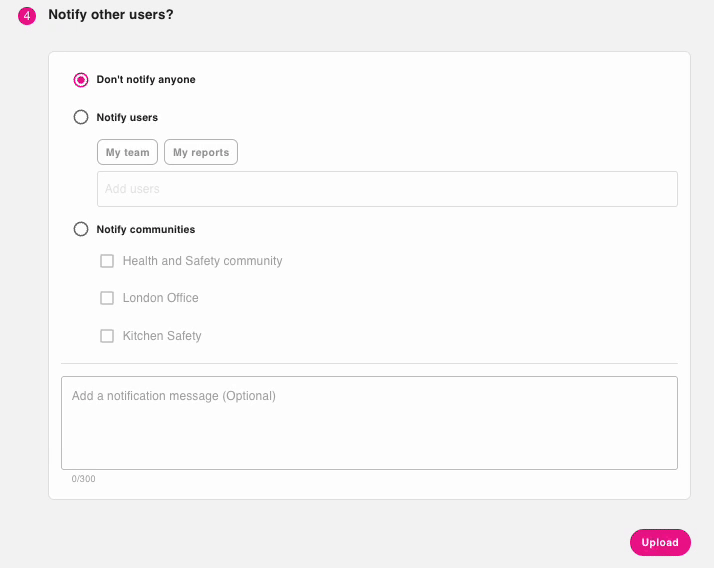
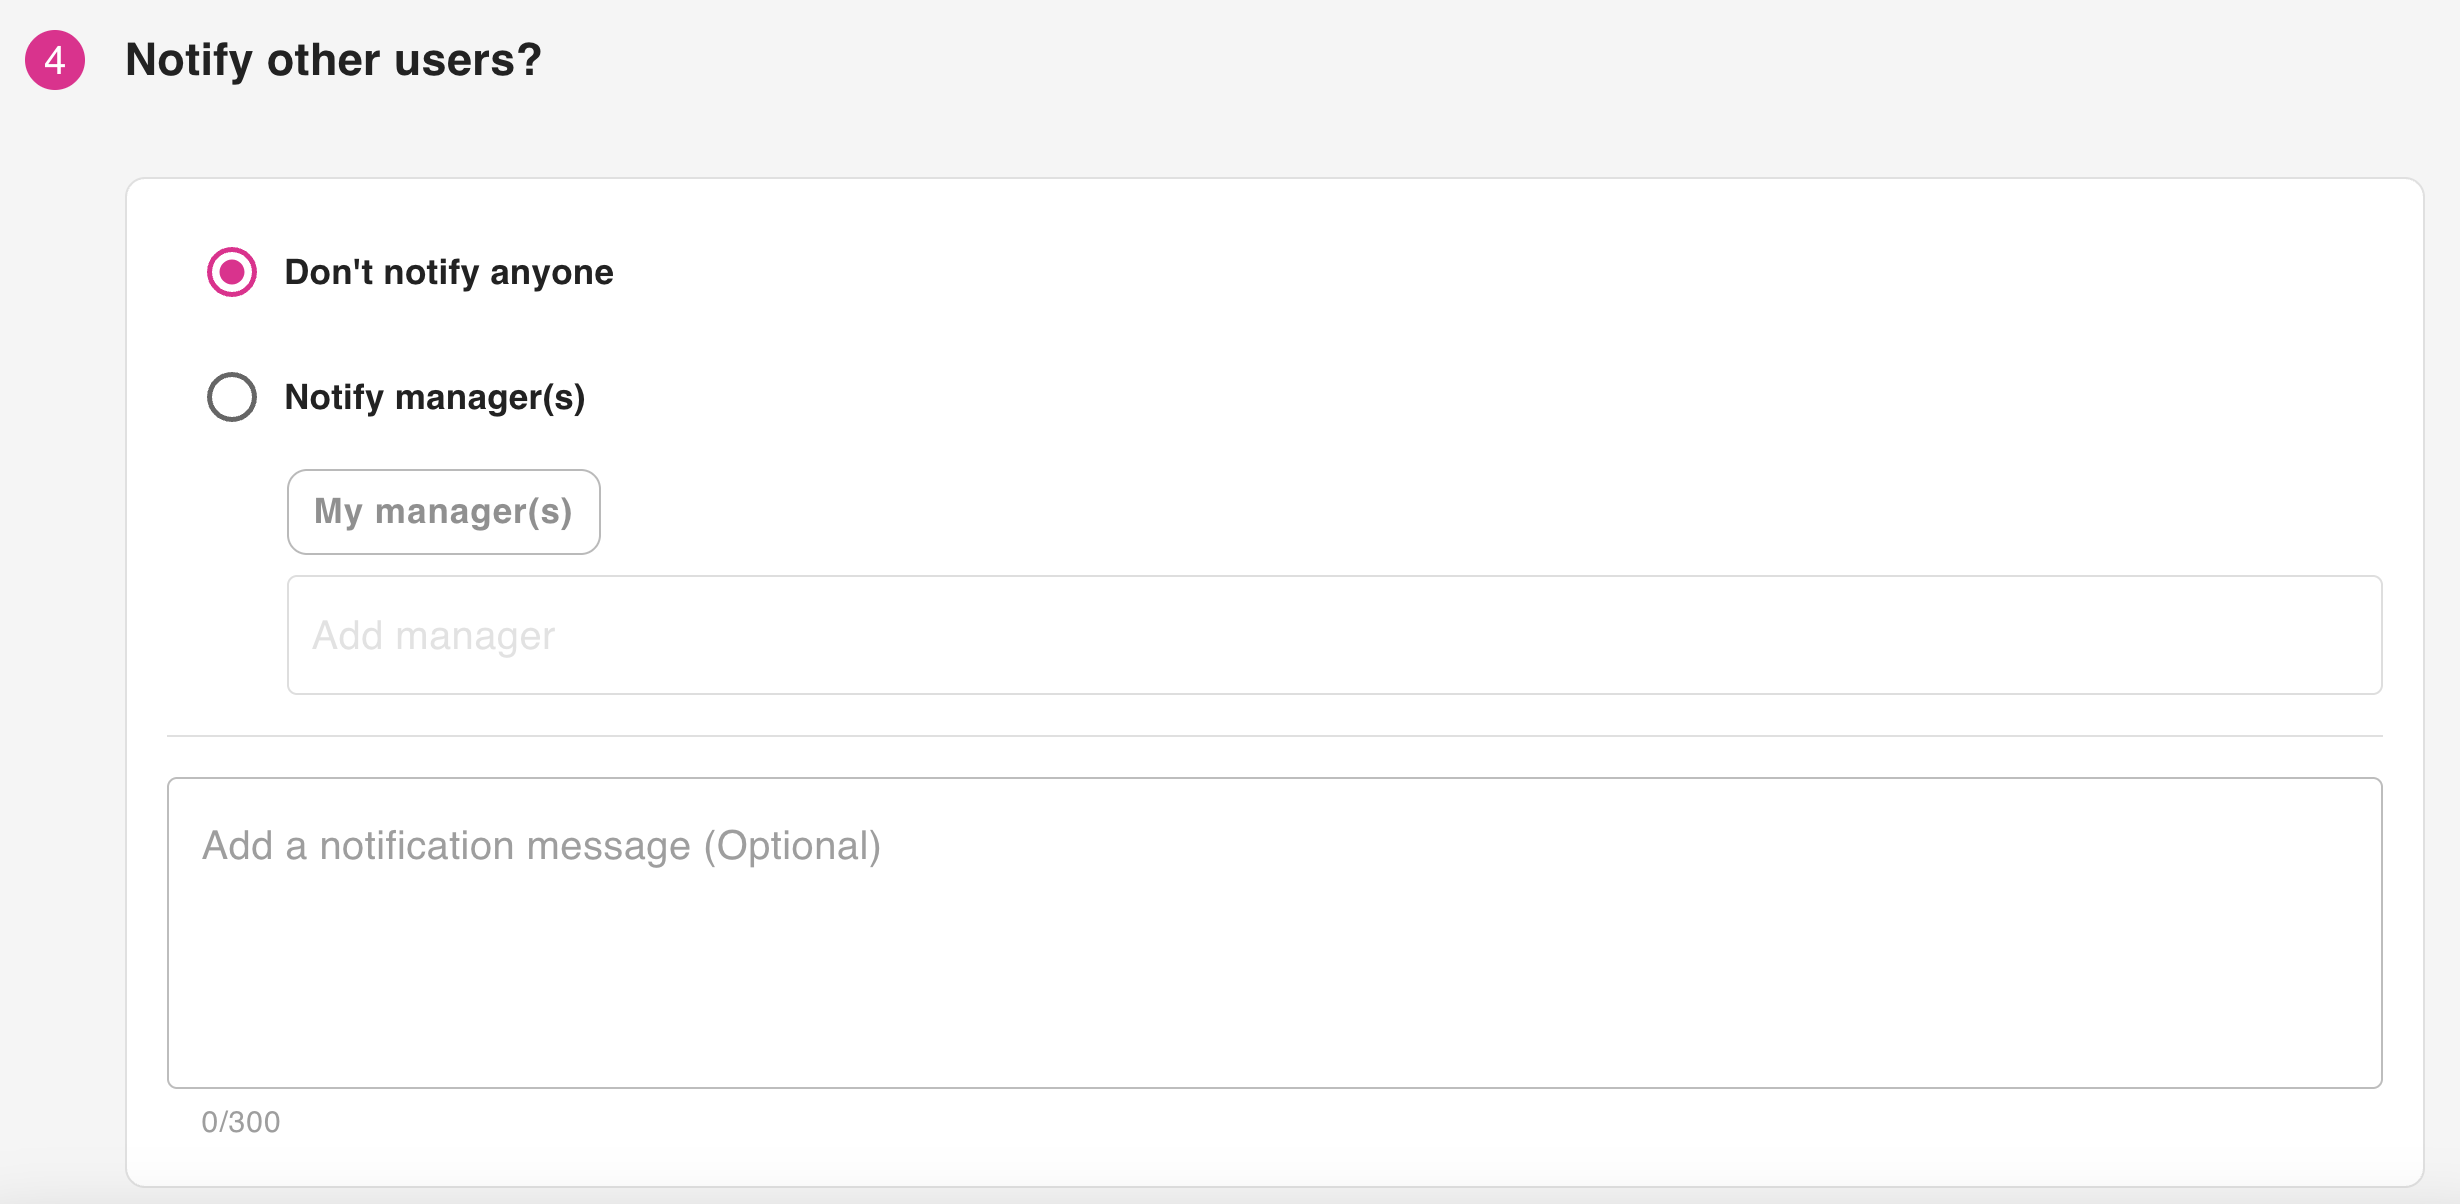
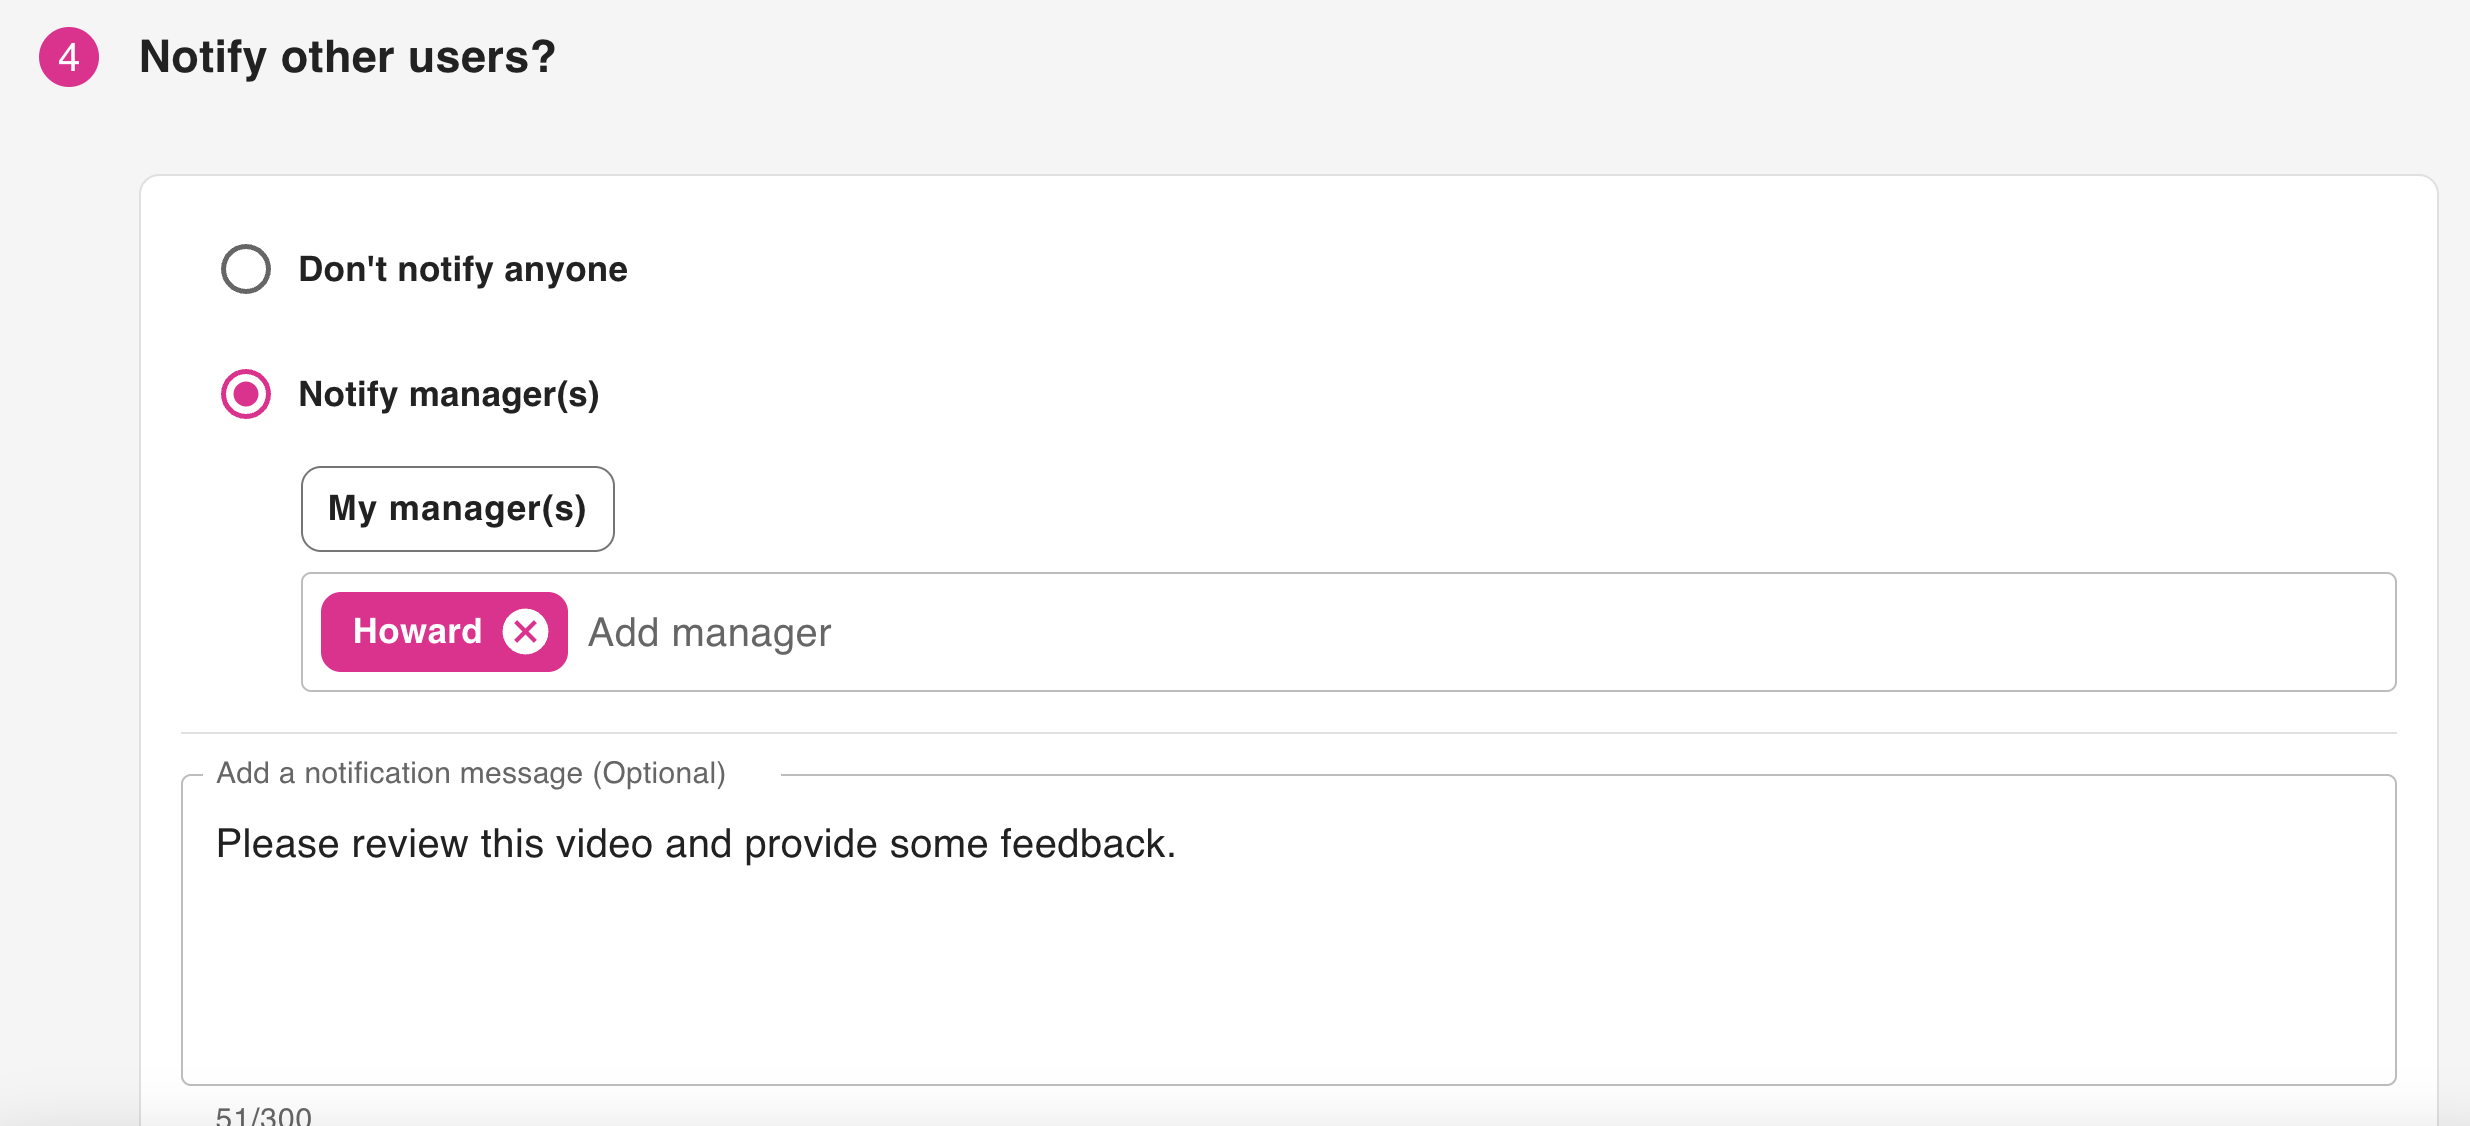
In the Notify other users? section, select whether or not to notify any users.
If you have selected Post to a community above in the previous step, you can select one of the following:
-
Don’t notify anyone: If this option is selected, no users will be notified that the file has been posted to the platform.
-
Notify users: If this option is selected, you can search for specific users or predefined groups of users in the selected communities, such as members of your team, your managers, or your reportees, and they will notified that the file has been posted. You can also enter a message which those selected users will see when they are notified about the file.
-
Notify communities: If this option is selected, you can notify one or more of the communities you are uploading the content to. All community members in the selected communities are notified as soon as the content is uploaded to the platform. You can also include an optional message to the recipients:
-
If you have selected Post to your evidence portfolio above in the previous step, you can select one of the following:
-
Don’t notify anyone: If this option is selected, no users will be notified that the file has been posted to the platform.
-
Notify manager(s): You can choose to notify your manager(s) so that they know the file is in your evidence portfolio. You might do this if you need your manager(s) to review the file. You can also enter a message which the managers will see when they are notified about the file.
-
-
-
Click Upload.
The file is uploaded to the platform.