
If you are a content owner, community admin or a member of an admin group with the Manage content permission enabled, you can schedule an existing item of content to be posted to a community at a future date and time. When the scheduled date and time arrives, the content is automatically posted to the specified community.
This is particularly useful if:
-
You want to post content to a community but won't be available to do it on the day itself.
-
You are an admin planning and creating content in advance.
-
An item of content exists in one community and you want to post it to a different community in advance.
-
You want to post content to a community at a time of day when lots of users are typically on Fuse. For example, you might use a heatmap in Universal Analytics to identify when users are most likely to be on Fuse and schedule the content to be posted at that specific time in the future.
For information on how content is ranked in smart feeds in Fuse, see .
The scheduled posts feature is distinctly different from the Scheduling feature in the Admin Panel, which allows admins to schedule in advance, when users, communities and audiences are notified about content.
Prerequisites
When creating a scheduled post:
-
You can only schedule a post for an item of content that already exists in Fuse. You cannot do this while posting a new item of content.
-
You can create a maximum of 5 queued scheduled posts for each item of content. If all 5 slots are currently taken for a particular item of content, you must wait for a slot to become available before scheduling another post.
-
When creating a scheduled post, you can only select a single community. If you wish to schedule the same post to multiple communities, you must create a new scheduled post for each community individually.
-
You can only post to communities where you are a member or community admin.
Scheduling a post
To schedule a post for an item of content:
-
Go to the content homepage for the item of content.
-
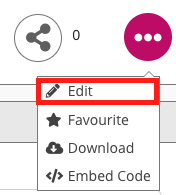
Click the ellipsis.

-
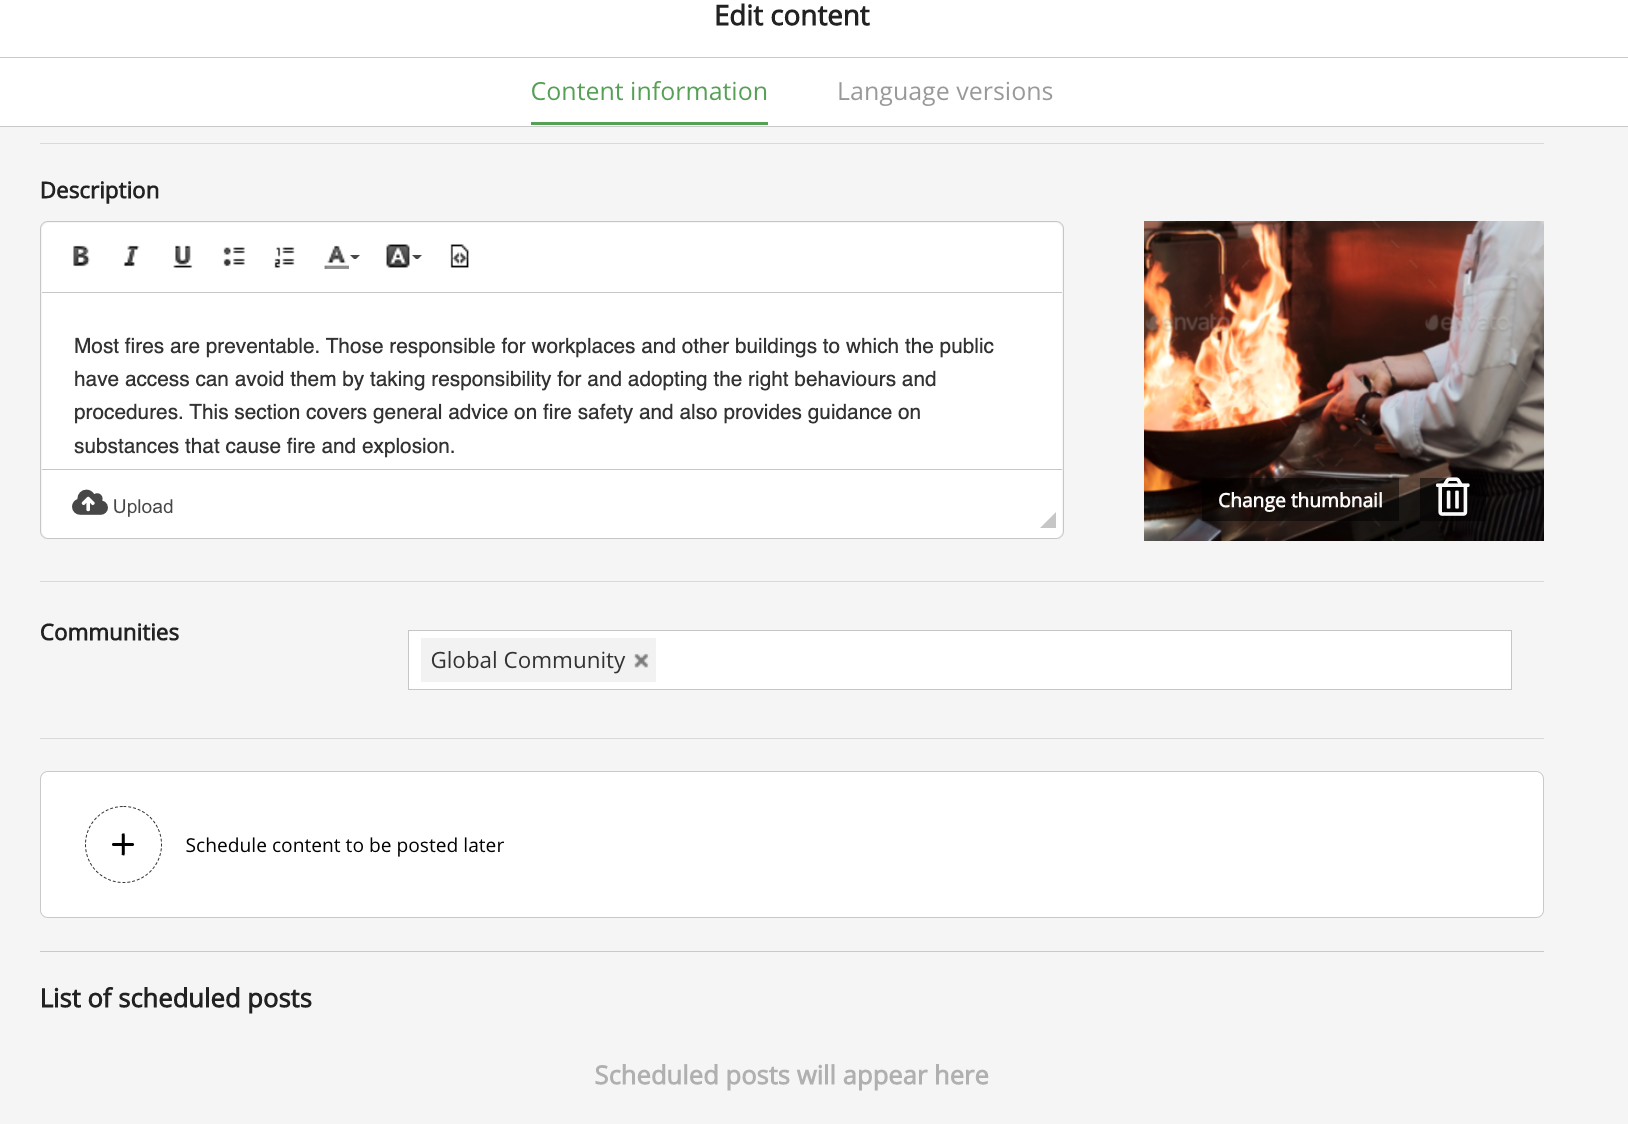
Click Edit.
The Edit content screen appears.
-
Click Schedule content to be posted later.

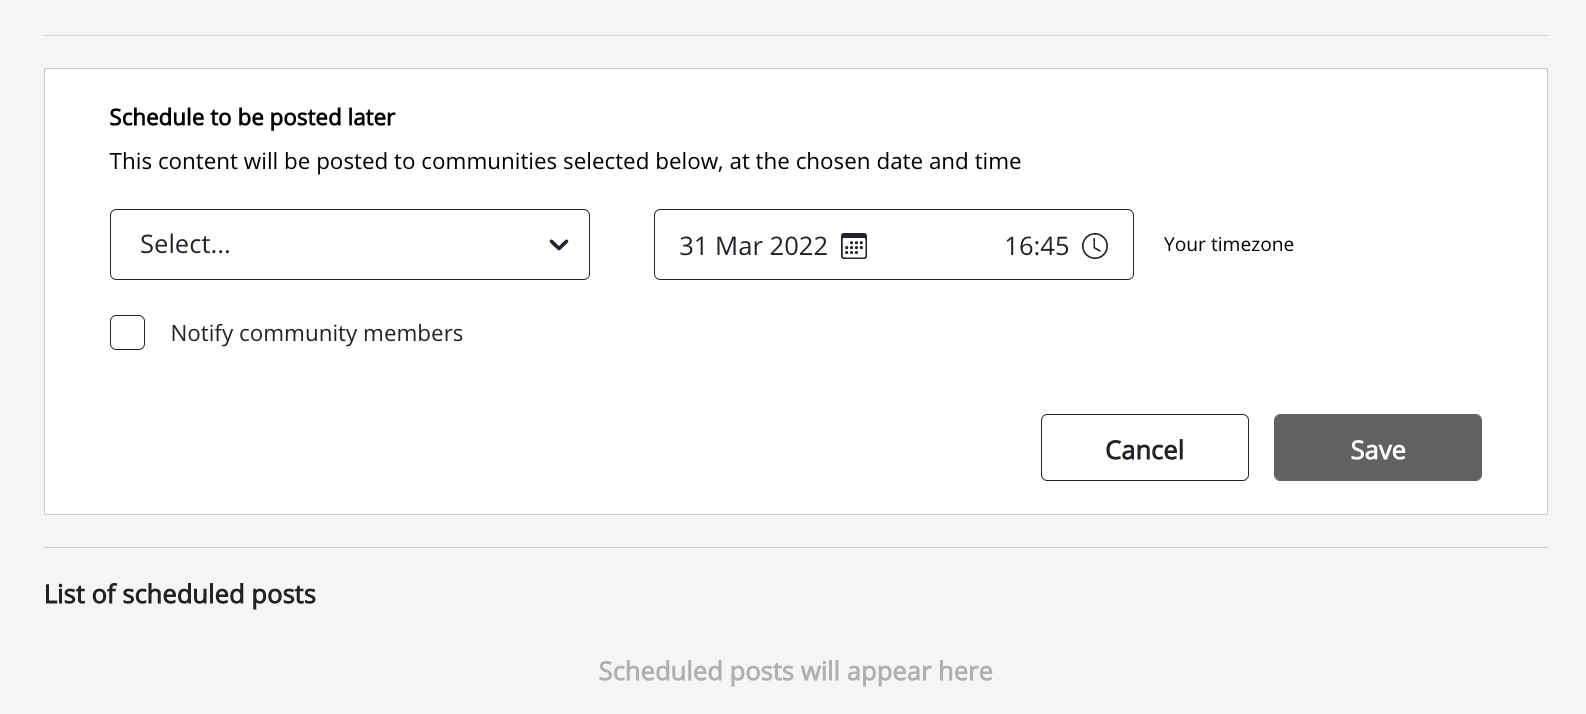
The scheduling options appear.
You can create a maximum of 5 scheduled posts for an item of content. If all five slots have been taken up for the item of content, you must wait until at least one of these is free before you can create a new post.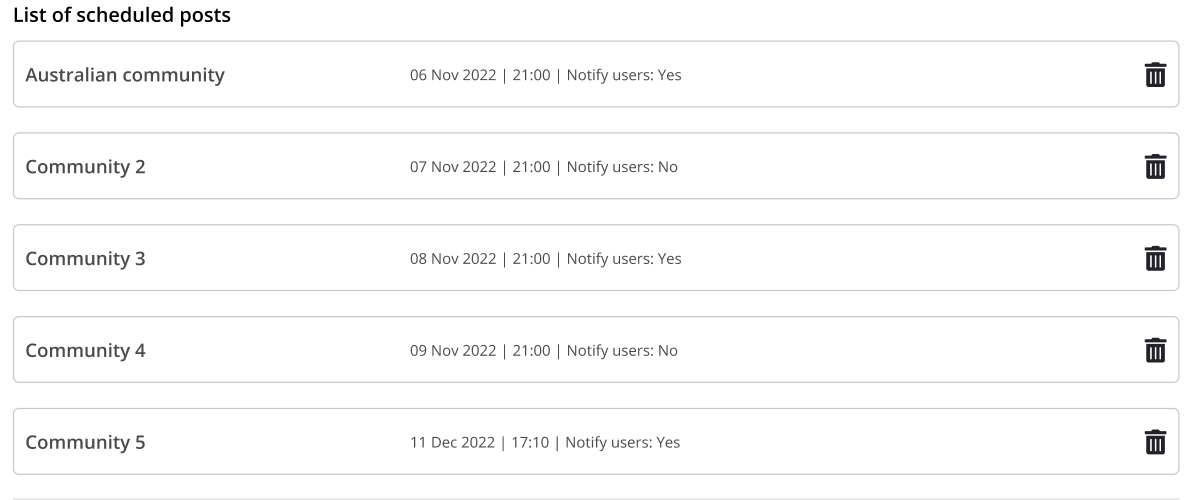
-
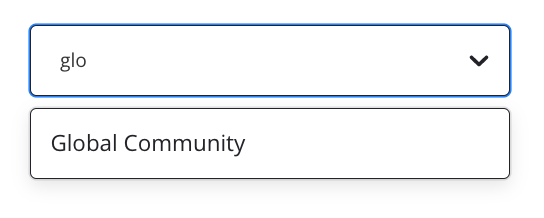
From the Select community dropdown, search for and select the community where the content will be posted. You can only select a community if the content has not been posted there yet.
-
From the date-time field, select the future date and time the content will be posted. For example, today might be the 27th of November and you may want to post this content 2 weeks later, on the 11th of December at 10:00am.
-
Browse to the correct month on the calendar and select a future date.
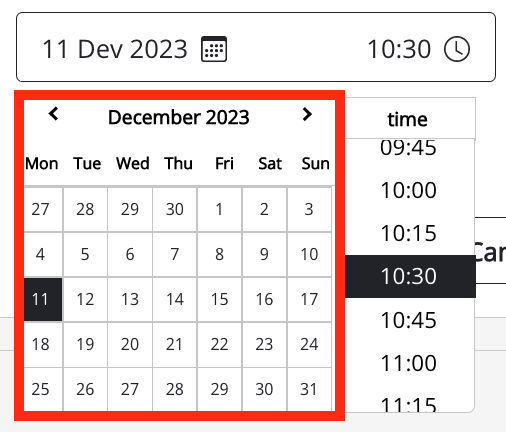
-
Select a time from the list.

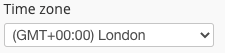
The time zone for scheduled posts is based on the Time zone field in your Fuse profile. For example, if (GMT +00:00) London is selected as your local time zone, the content will be posted on the selected date and time in that time zone.
-
-
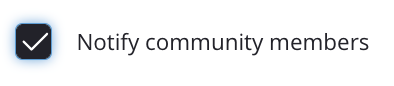
[Optional] To notify all community members once the content has been posted, select the Notify community members checkbox. If this checkbox is not selected, community members are not notified once the content has been posted, with the exception of admins. As a safety measure, at the scheduled date and time, Fuse checks the permissions of the user who has created the scheduled post. If the user who scheduled the post no longer has the correct permissions to post to the selected community, the content is not posted and the user is notified of this.
-
Click Save.

The content is scheduled to be posted and appears in the list of pending scheduled posts.
You cannot edit the details of a scheduled post once it has been created. If you want to make changes to an existing scheduled post, you must delete it and create a new one.
Deleting a scheduled post
To delete a scheduled post, click the Delete icon on the right-hand side of the post.
