
The Scheduling screen allows admins to schedule a date and time to share content with users, communities, and audiences.
This feature is distinctly different from the Scheduled posting feature, which allows content owners, community admins and members of admin groups to schedule content to be posted to communities in advance.
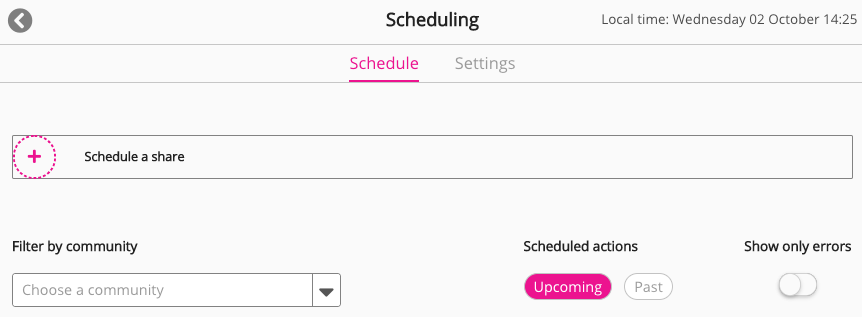
Schedule tab
To schedule a date and time to share content:
-
On the Schedule tab, click Schedule a share.
The Schedule a share screen appears.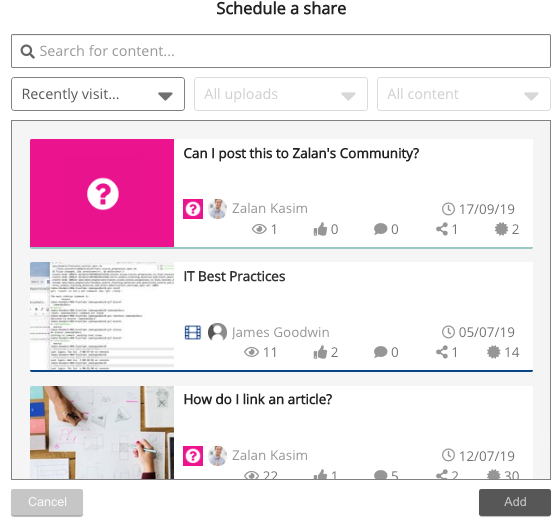
-
On the Schedule a share screen, select the content to share. If necessary, filter displayed content by typing the name of the content in the Search for content... field and using the dropdown lists.
-
Click Add.
The following screen appears.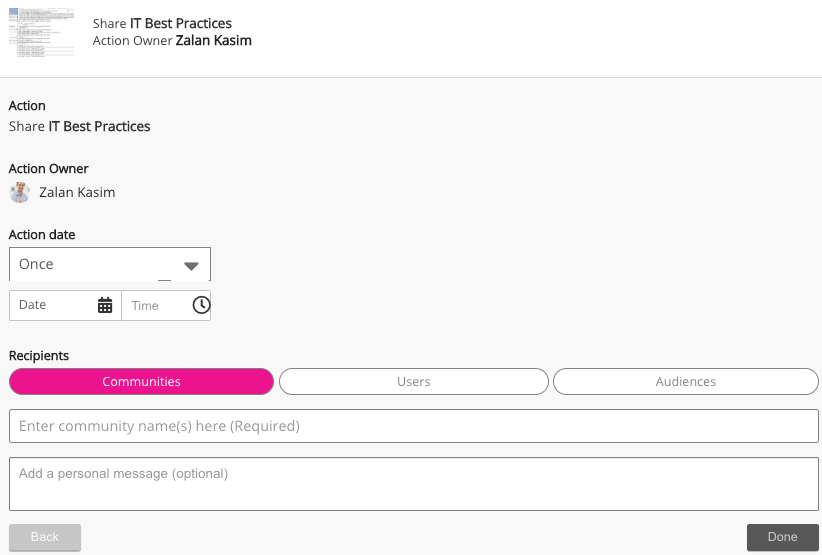
-
In the Action date area, follow the steps below to configure when to share the content:
-
Click the dropdown to select how often to share the content.
The available configurations differ depending on your selection. In the screenshot below, content is selected to be shared Weekly.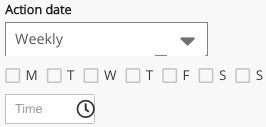
-
Depending on your selection, select the day(s) or date, and the time, to share the content.
-
-
In the Recipients area, follow the steps below to configure who to share the content with.
Select one of the following options:-
Communities: Shares the content with all users in one or more selected communities.
-
Users: Shares the content with one or more selected users.
-
Audiences: Shares the content with one or more selected audiences.
-
-
Depending on your selected option, click the field below to enter one or more communities, users, or audiences.
-
If necessary, in the Add a personal message (optional) field, enter a message to appear alongside the shared content.
-
Click Done.
The content is scheduled to be shared and appears on the Schedule tab.
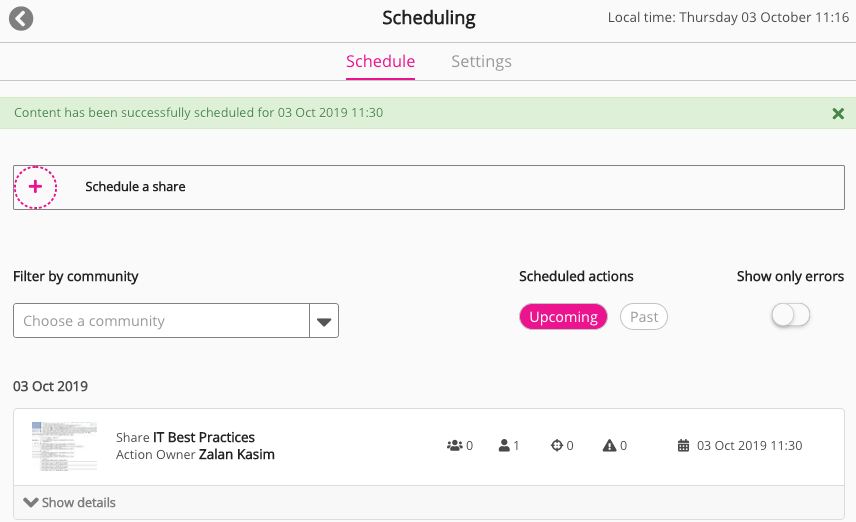
The table below lists the viewing options available on the Schedule tab.
|
Option |
Description |
|---|---|
|
Filter by community |
To only display scheduled shares with content existing on a specific community, click the dropdown and enter the community name. |
|
Scheduled actions |
Select one of the following options:
|
|
Show only errors |
Click the toggle to only display failed scheduled shares. |
|
Show details |
Click Show details for a scheduled share to display details configured on the Schedule tab. 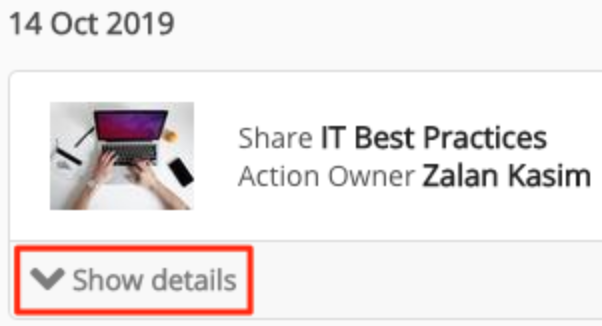
To delete a scheduled share:
|
Settings tab
To grant permissions for different user types to schedule shares:
-
On the Scheduling screen, click the Settings tab.
The Scheduling permissions table appears.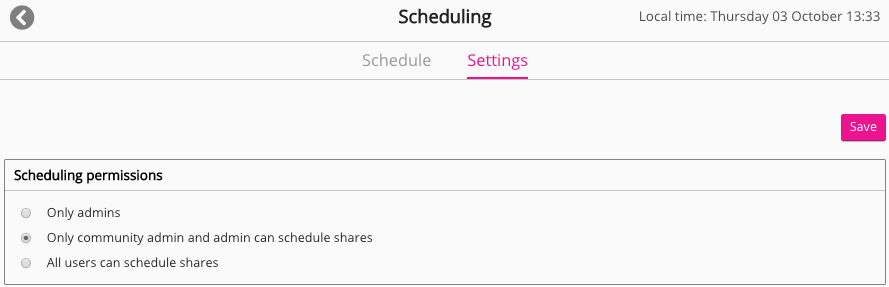
-
On the Scheduling permissions table, select the user type to grant permission to schedule shares. By default, only admins have permission to schedule shares.
-
Click Save.
The selected user type is able to schedule shares.