When migrating from your legacy LMS platform to Fuse, you may want to transfer historic event attendance data. You can import this data to Fuse and create the necessary Fuse events and corresponding occurrences via CSV, in the Events tab of the Imports screen.
Below you will find sections on:
-
How to format the CSV and the data/headings that must be included
-
The typical end-to-end process for moving event data from your legacy platform to Fuse
Important information
-
You can only upload CSV files when importing data - attempting to import other file formats will cause the import to fail.
-
It is recommended that you import a maximum of 500 rows of data per CSV file.
-
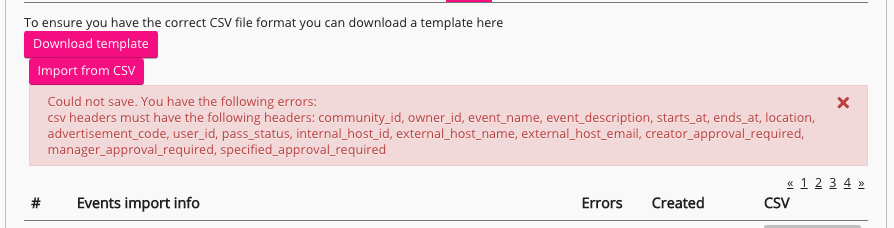
If there are errors with headers in the CSV file, such as a header is missing or incorrectly formatted, Fuse rejects the whole CSV file and an error is shown, as follows:
-
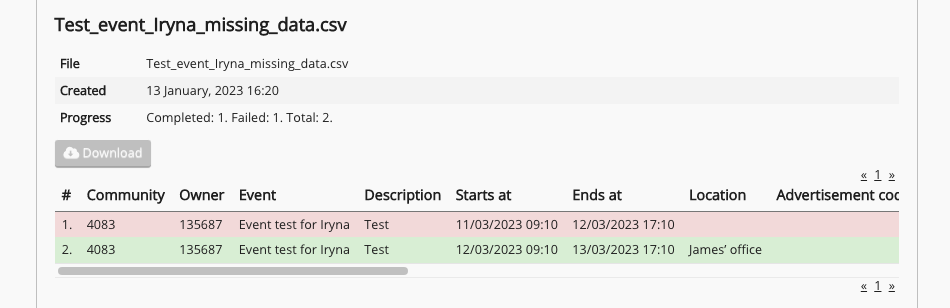
If any of the rows in the CSV have incorrect or missing mandatory data, those particular rows won’t be imported and are shown in red. Only rows in the CSV with correct and complete data, shown in green, will be imported. For example, if one of the rows is missing information related to Location, that row will be marked in red and won’t be imported:
-
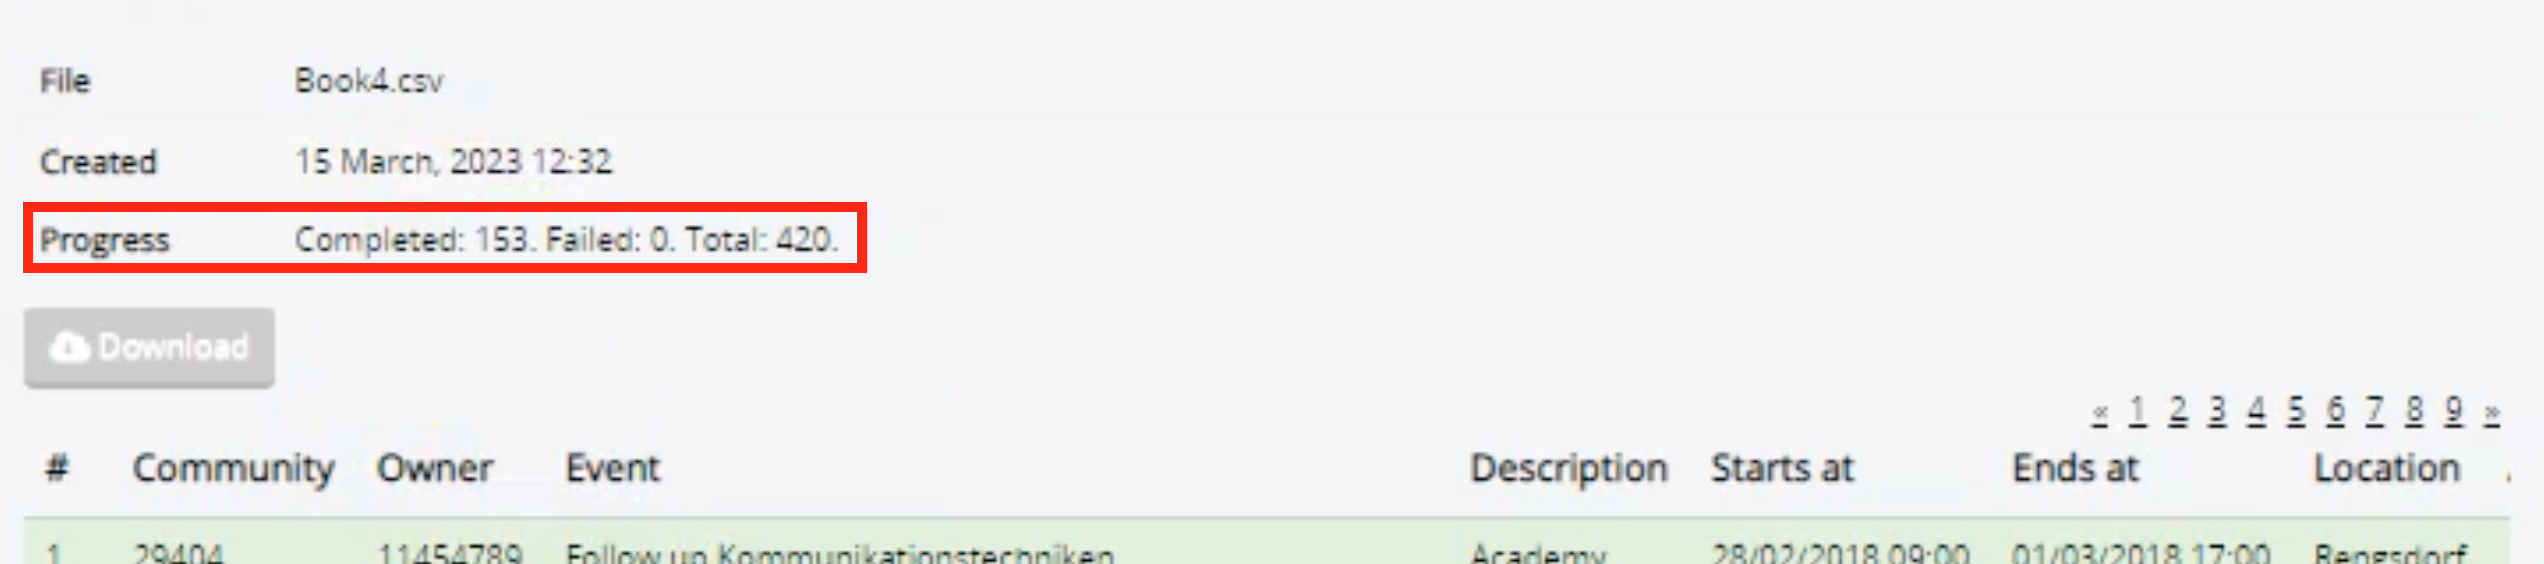
You may need to wait a while before the import completes, especially if there is a lot of data being imported. You can check the progress of an import by refreshing the page and then checking the number of rows that have been imported so far in the Progress section. Each time you refresh the page, the number of imported rows will increase. In the example below, the total number of rows being imported is 420 but so far only 153 have been completed.
-
When importing data for events and occurrences that don’t currently exist in Fuse, please be aware of the following:
-
If the information in the event_name column differs from the others in the CSV, a brand new event will be created with that title.

-
If the information in the starts_at, ends_at, or location column differs to others in the CSV, but the event_name remains the same, a new occurrence for the event will be created.

-
CSV format
Before the legacy event data can be imported to Fuse, it must be formatted correctly in a CSV so that Fuse can process it. Only data shown below can be added to the CSV and imported to Fuse, which means any additional historical data/columns related to events in your legacy platform must be deleted. Once the historical data has been correctly formatted (so that only the required data is present in the CSV), you can use the VLookup function in Excel or Google Sheets to pull in the corresponding Fuse user IDs for the event attendees, and add the ID of an existing community to each event, so that each event is created in the correct Fuse community.

Only the following data/headings can be included in the CSV:
|
Header |
Data |
|---|---|
|
community_id |
The ID of the community in which the event will exist. This data is mandatory. You can obtain a community's ID by viewing the URL of the community homepage. |
|
owner_id |
The user ID of the event owner. This data is mandatory. A user's ID is visible in the URL of their Personal settings page: |
|
event_name |
The name of the event. For example, All employee training day. This data is mandatory. |
|
event_description |
The description of the event. This data is mandatory. |
|
starts_at |
The date and time the event started. This data is mandatory. Date and time must be in following format: DD-MM-YYYY HH:MM For example, 01-01-2019 20:20. |
|
ends_at |
The date and time the event ended. This data is mandatory. Date and time must use the following format: DD-MM-YYYY HH:MM For example, 01-01-2019 20:20. |
|
location |
The location of the event. For example, The City Conference Centre. This data is mandatory. |
|
advertisement_code |
Unique code to identify the event (If one has been specified). This data is optional. |
|
user_id |
ID of the user who participated in the event. This data is mandatory. A user's ID is visible in the URL of their Personal settings page: |
|
pass_status |
Whether or not the user attended the event. The following statuses apply:
Other status options (such as waitlisted) are not displayed. This data is optional. |
|
internal_host_id |
The ID of the Fuse user hosting the event. You only need to enter this data if your event has an internal host. |
|
external_host_name |
The name of the external user hosting the event. This is someone who does not have a user account in Fuse. For example, David Johns. You only need to enter this data if your event has an external host. |
|
external_host_email |
The email address of the external user hosting the event. This is someone who does not have a user account in Fuse. For example, david.johns@email.com. You only need to enter this data if your event has an external host. |
|
creator_approval_required |
Whether or not creator approval is required when users apply to join the event. This can be TRUE or FALSE. This data is optional. |
|
manager_approval_required |
Whether or not a user must seek approval from their manager before being able to join the event. This can be TRUE or FALSE. This data is optional. |
|
specified_approval_required |
Whether or not a specified Fuse user (who is not the event owner or the user's manager) must give permission for a user to join the event. This can be TRUE or FALSE. This data is optional. |
The typical process for importing legacy event data
This is the typical end-to-end process for transferring event data from your legacy platform to Fuse:
-
In Fuse, in the Reporting screen, create and run the All users report, then delete all fields from the report, other than the columns you need to reference, such as User ID, Email, Username. This will serve as a reference guide when looking up each user’s details, such as their name and Fuse user ID.
-
Arrange a data freeze in your legacy platform to ensure that any exported data is current and up to date.
-
Generate a report in your legacy platform, containing a list of all events.
-
Open the event report that you generated in your legacy platform in Excel or Google Sheets, and delete all columns that cannot be imported to Fuse - but leave the user's email address (or username, employee number etc) as this will be used to lookup each user’s Fuse user ID.
-
Create a new column in the event report for Fuse ‘User ID’ and use the Vlookup function in Excel or Google Sheets to reference the common key between the reports (email address, username, employee number etc.) to pull the Fuse user ID from the All Users report.
-
Create another column in the event data report for the Fuse ‘community_id’ then populate this with relevant Fuse community IDs. You can also use Vlookup or Lookup functions to populate these automatically if required.
-
Verify that the data is correctly formatted, and ensure all the correct Fuse event headings and data is filled out, as per the CSV format table above, and that there are no additional columns or formatting issues.
-
Save the file as a CSV.
-
In Fuse, go to Admin Panel > Import > Events tab and import the CSV file.

-
If there are errors with the headers of the file, such as missing headers or spelling errors in headers, Fuse rejects the whole CSV and an error is shown, as follows:
-
If any of the rows in the CSV have incorrect or missing mandatory data, those particular rows won’t be imported and are shown in red. Only rows in the CSV with correct and complete data, shown in green, will be imported. For example, if one of the rows is missing information related to Location, that row will be marked in red and won’t be imported:
-
You may need to wait a while before the import completes, especially if there is a lot of data being imported. You can check the progress of an import by refreshing the page and then checking the number of rows that have been imported so far in the Progress section. Each time you refresh the page, the number of imported rows will increase. In the example below, the total number of rows being imported is 420 but so far only 153 have been completed.
-
-
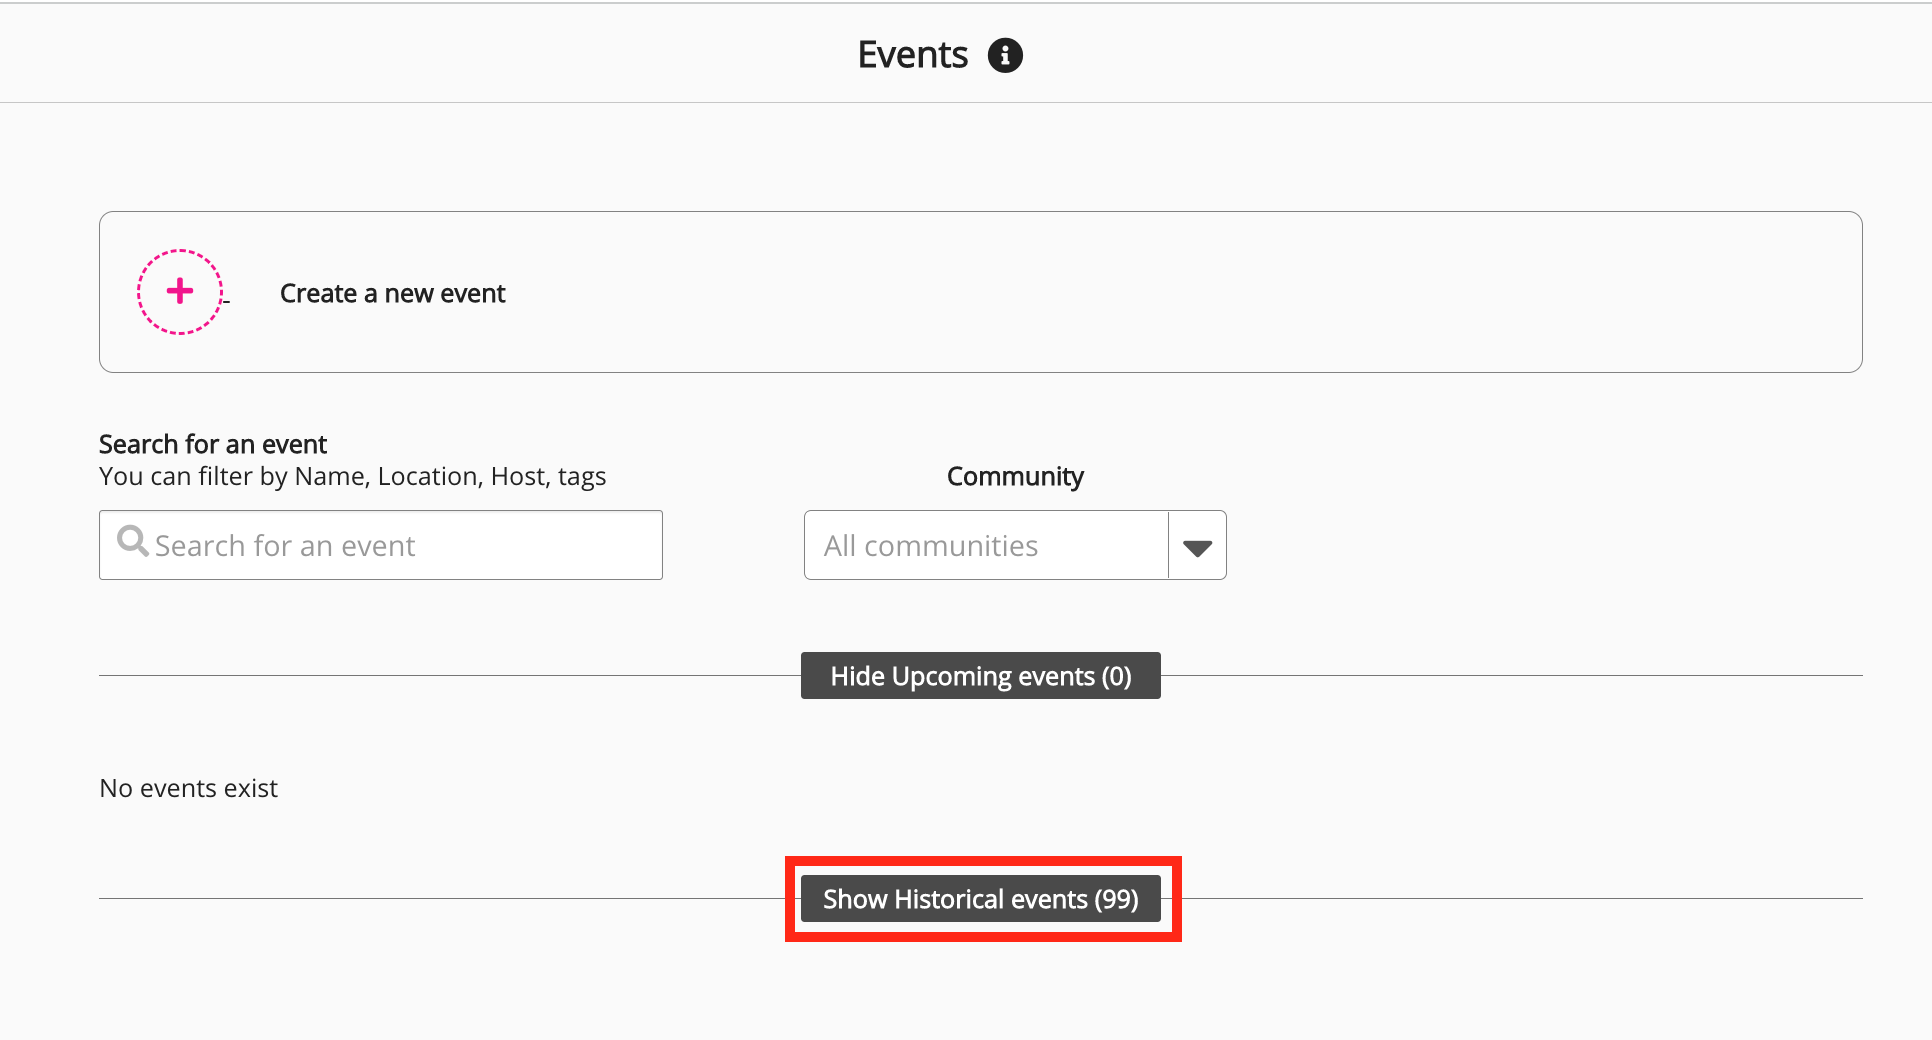
When the import has successfully completed, go to Admin Panel > Events, and at the bottom of the screen, click Show Historical Events. The imported events will be listed and you can click on each one to see occurrences and attendees.