
You can manage and adjust the settings for each event occurrence, on the occurrence management screen. The occurrence management screen is spilt into several tabs, each related to different area of an event occurrence. Here you can adjust various settings such as the description, the host, the number of spaces available, the start and end dates, as well as manage applicants (such as adding, removing, and bulk-importing attendees to the event occurrence), viewing user withdrawals, and managing those on the waitlist.
Accessing the occurrence management screen
If you are an admin, you can access the occurrence management screen from one of the following locations:
-
On the occurrence screen, click Manage Event.

-
On the Events admin screen:
-
On the Events admin screen, on list of upcoming or historical events, click Show occurrences for the event you want to manage.
A list of occurrences for the event appears.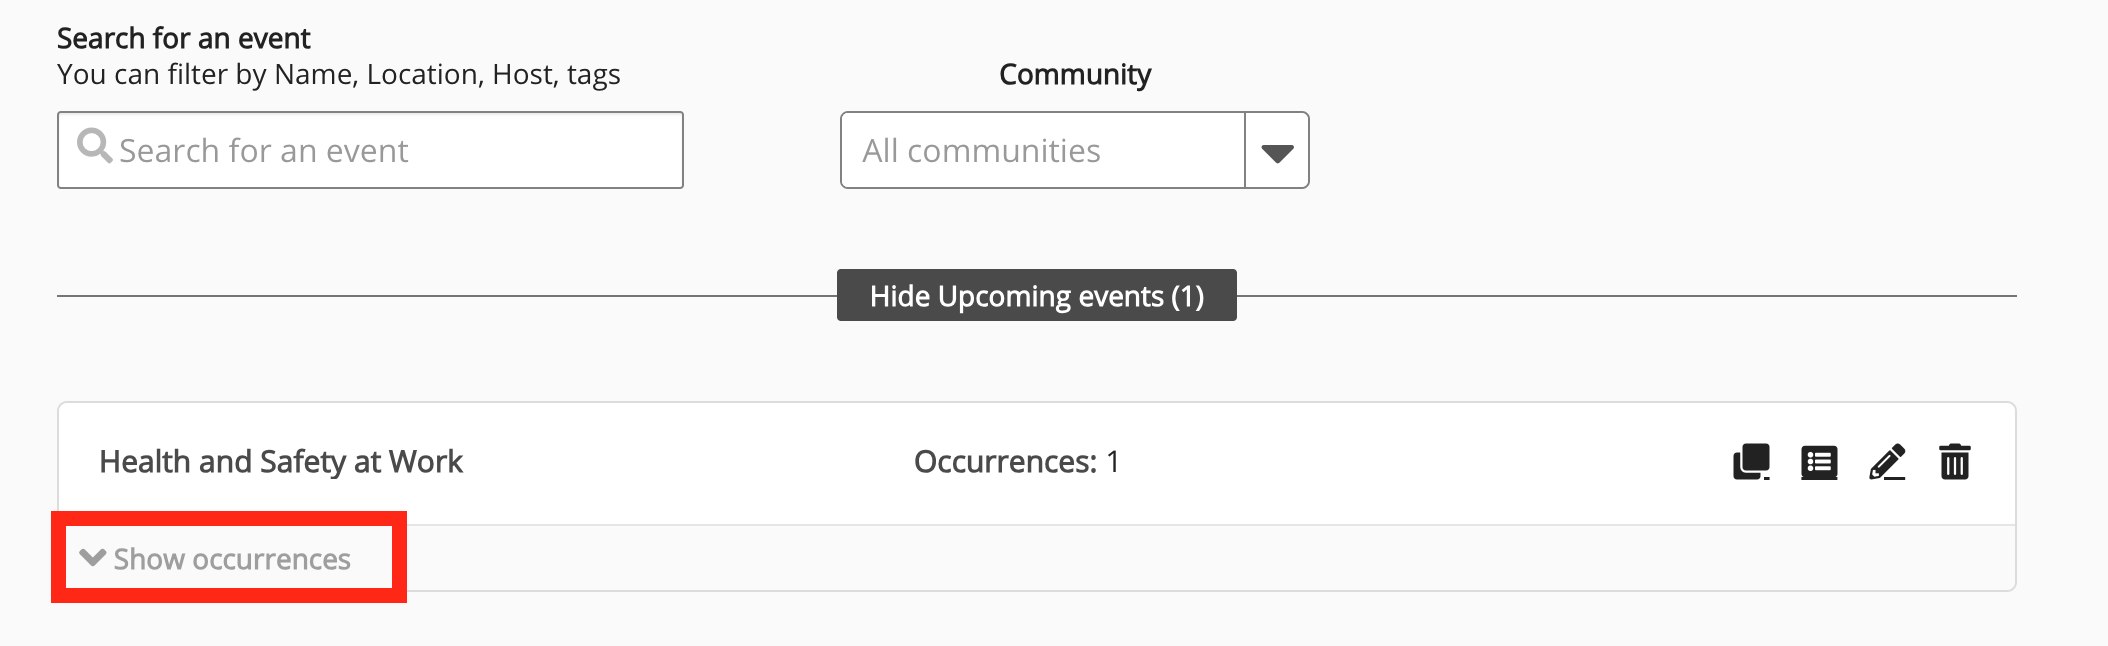
-
On the list of occurrences, click the edit icon for the occurrence you want to manage.
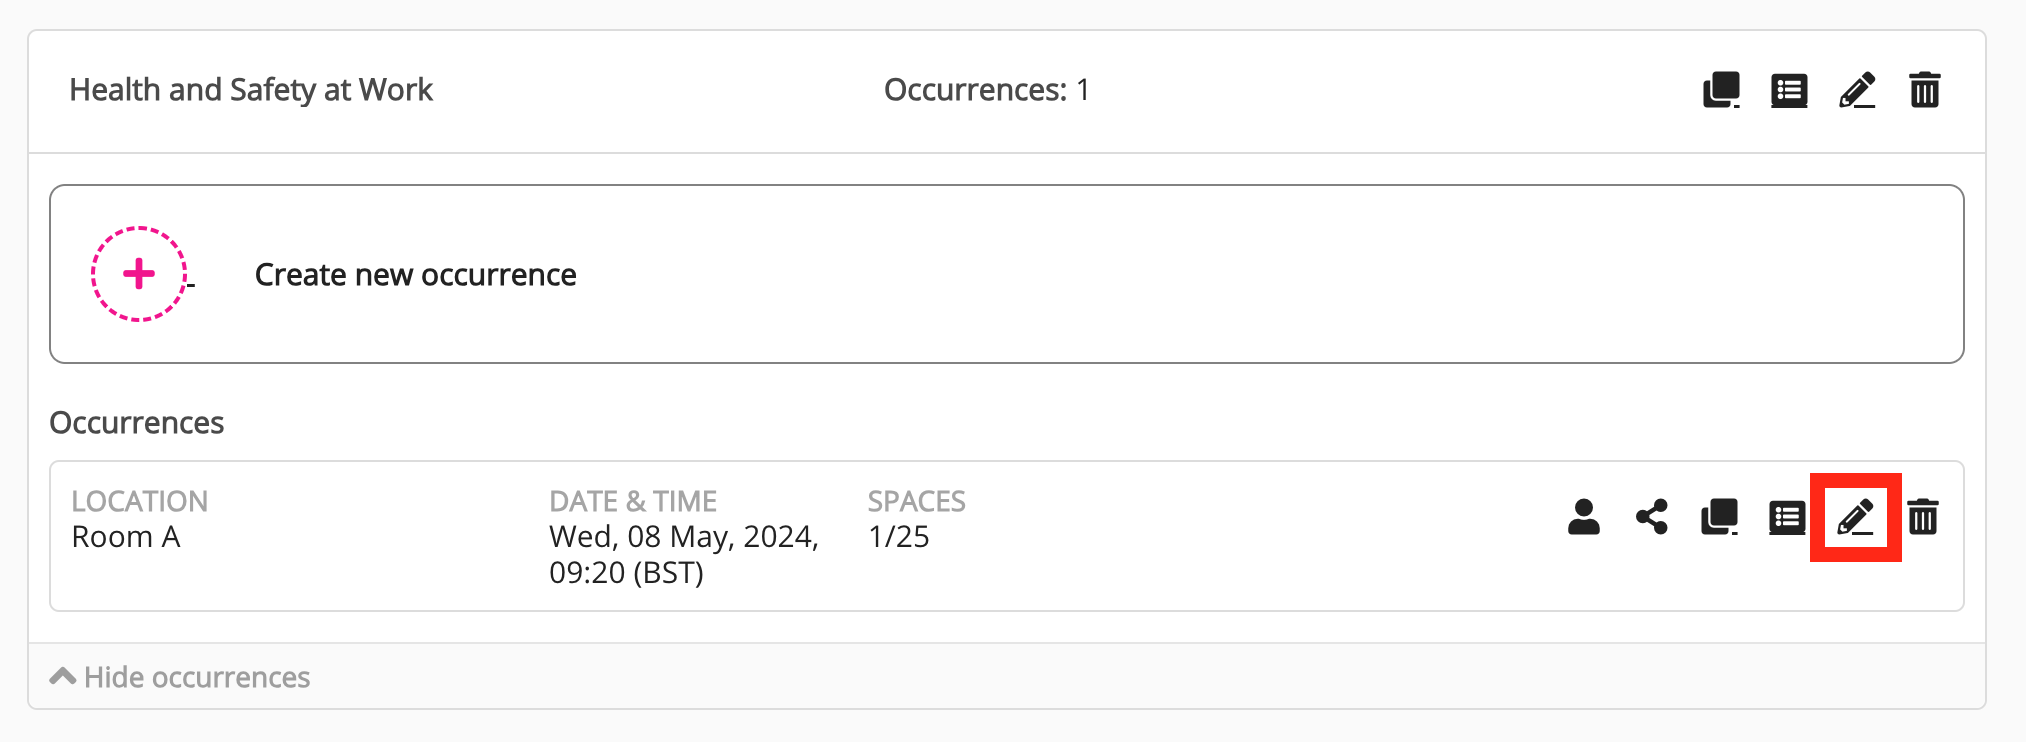
The occurrence management screen for the event appears.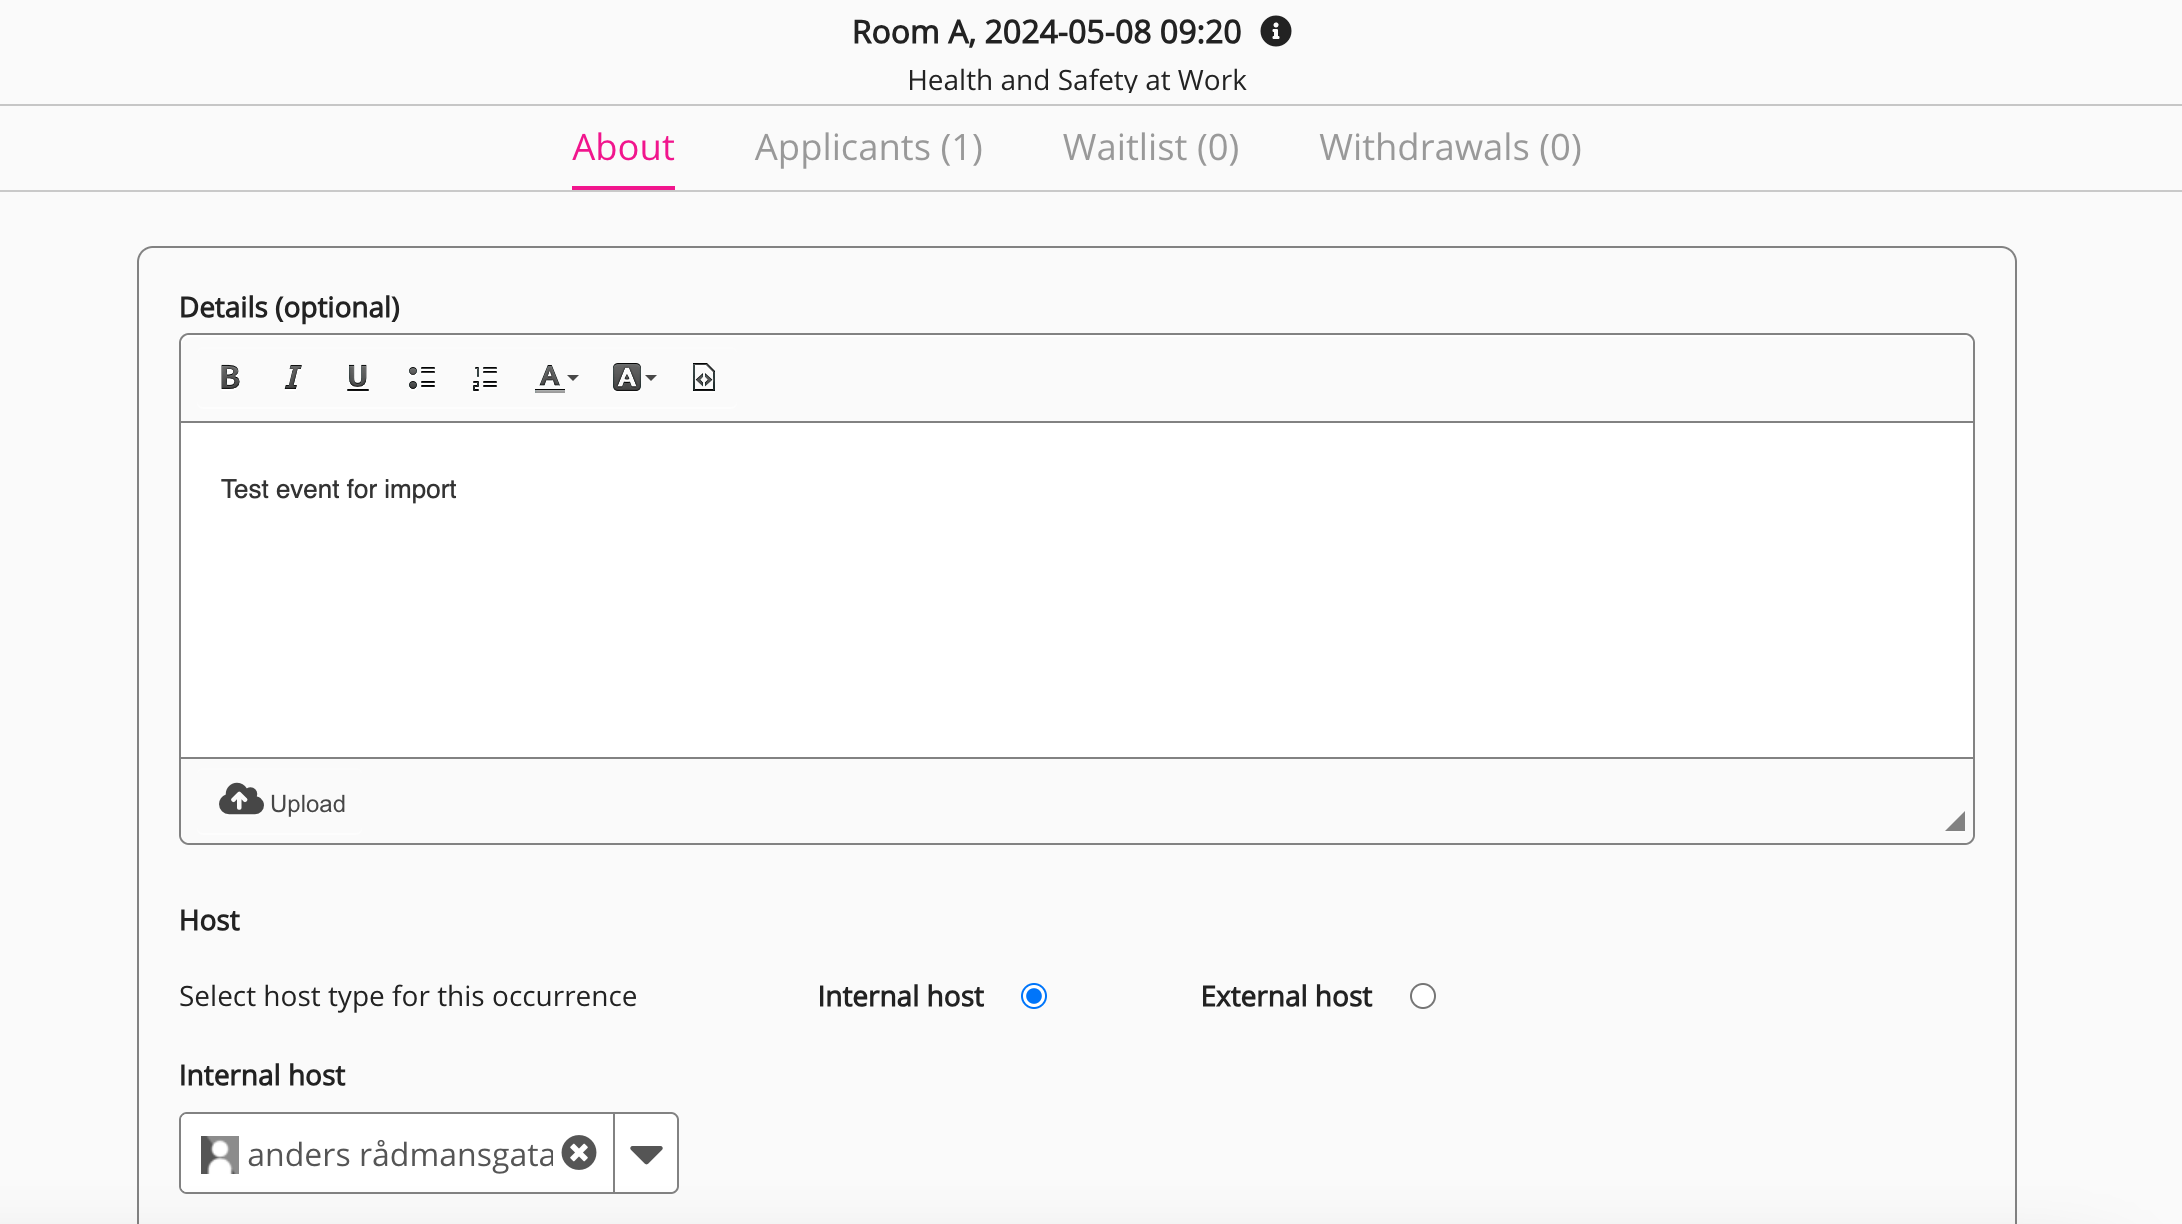
Admin functionality on the occurrence screen is only available using the web platform on tablet-size screens or larger.
Available tabs
The following tabs are available when managing an event occurrence:
About tab
Click the About tab to reconfigure occurrence details, such as spaces and start & end dates.
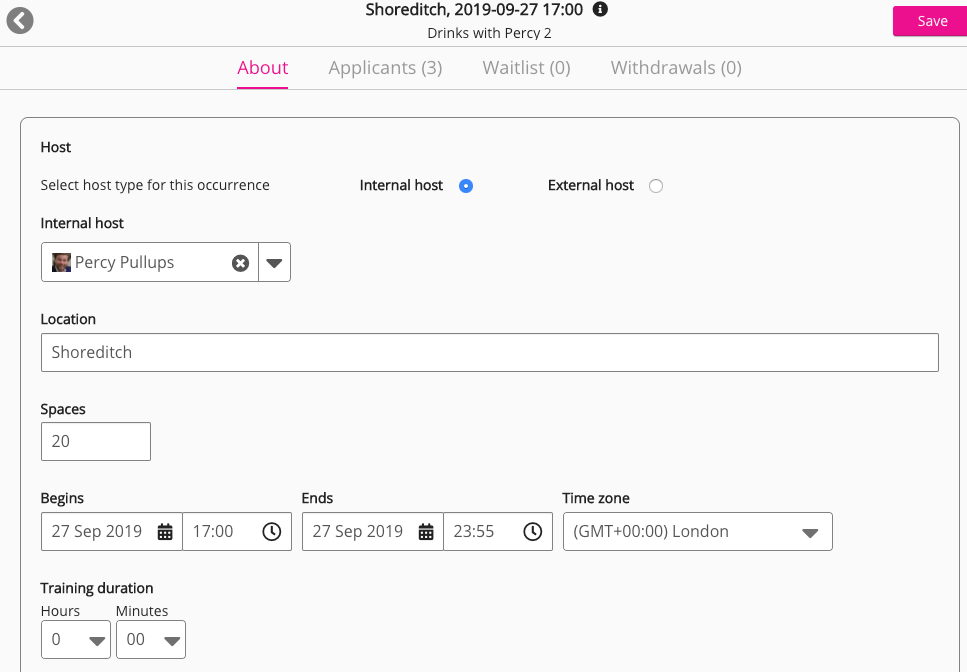
The configurations available on the About tab are the same configurations available in the Occurrence(s) section of the New event screen.
If you want to make changes to any configurations on the About tab, you must click the Save button on the top-right of the screen before clicking another tab.
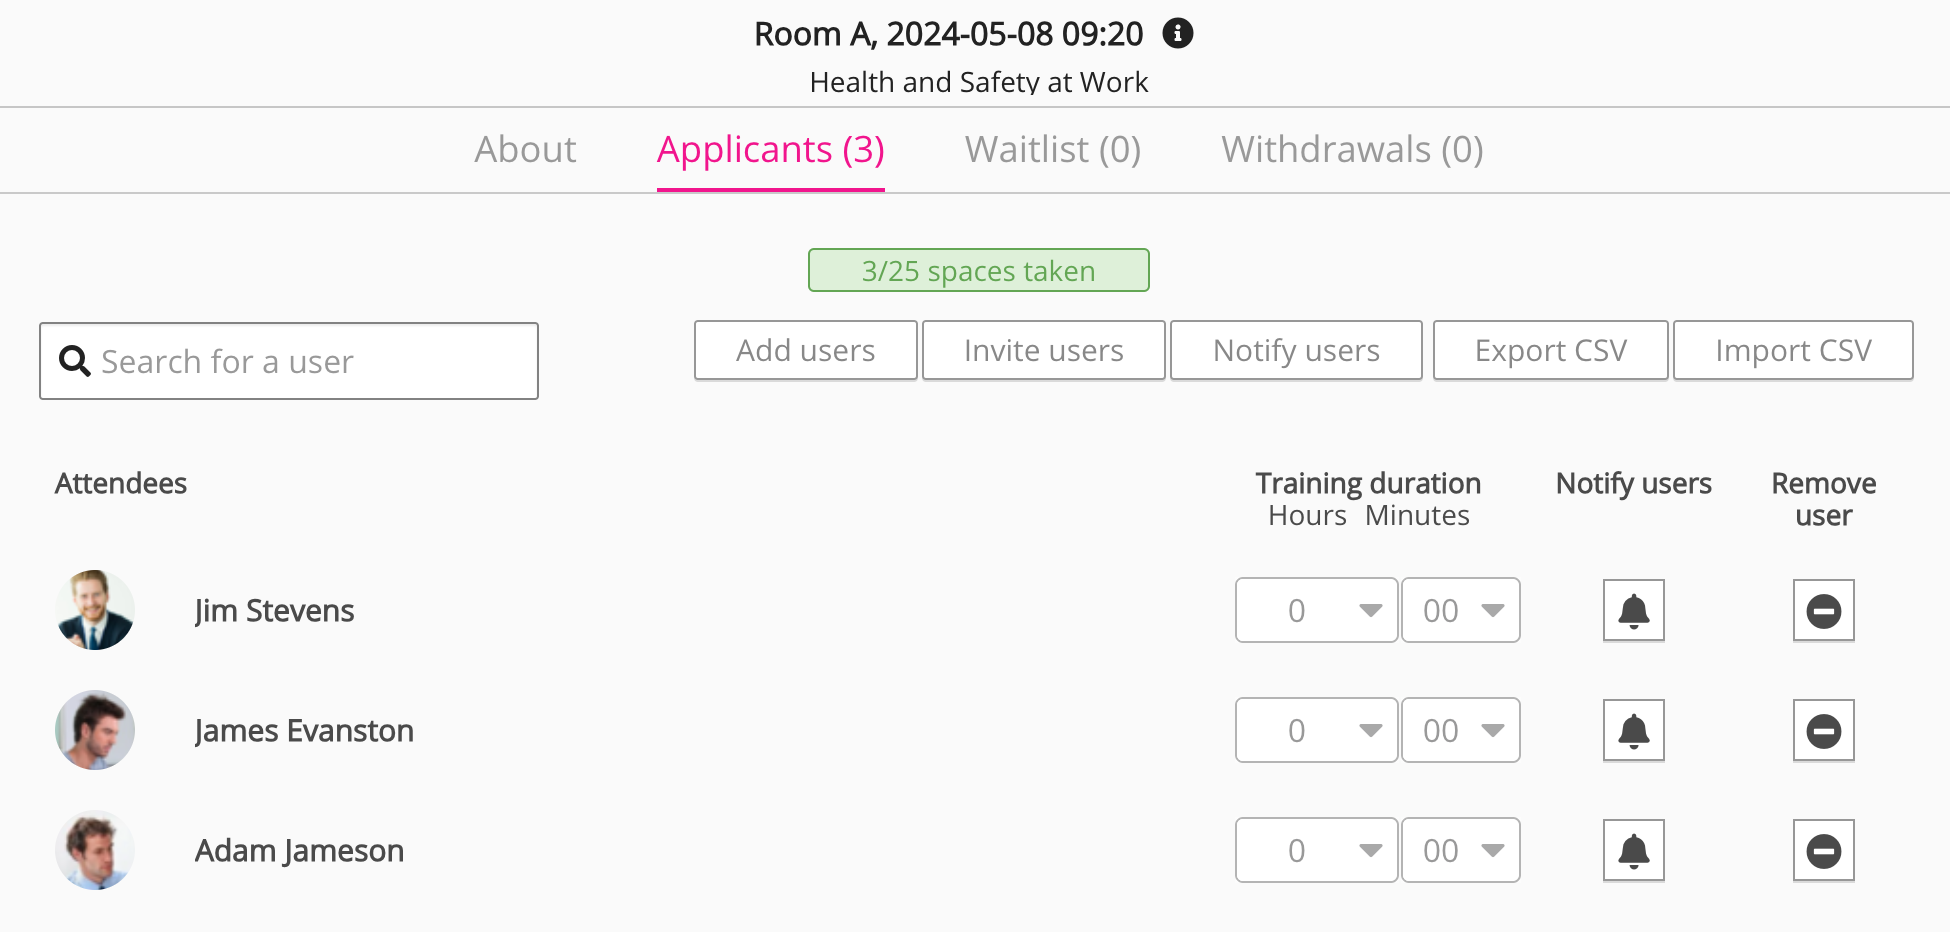
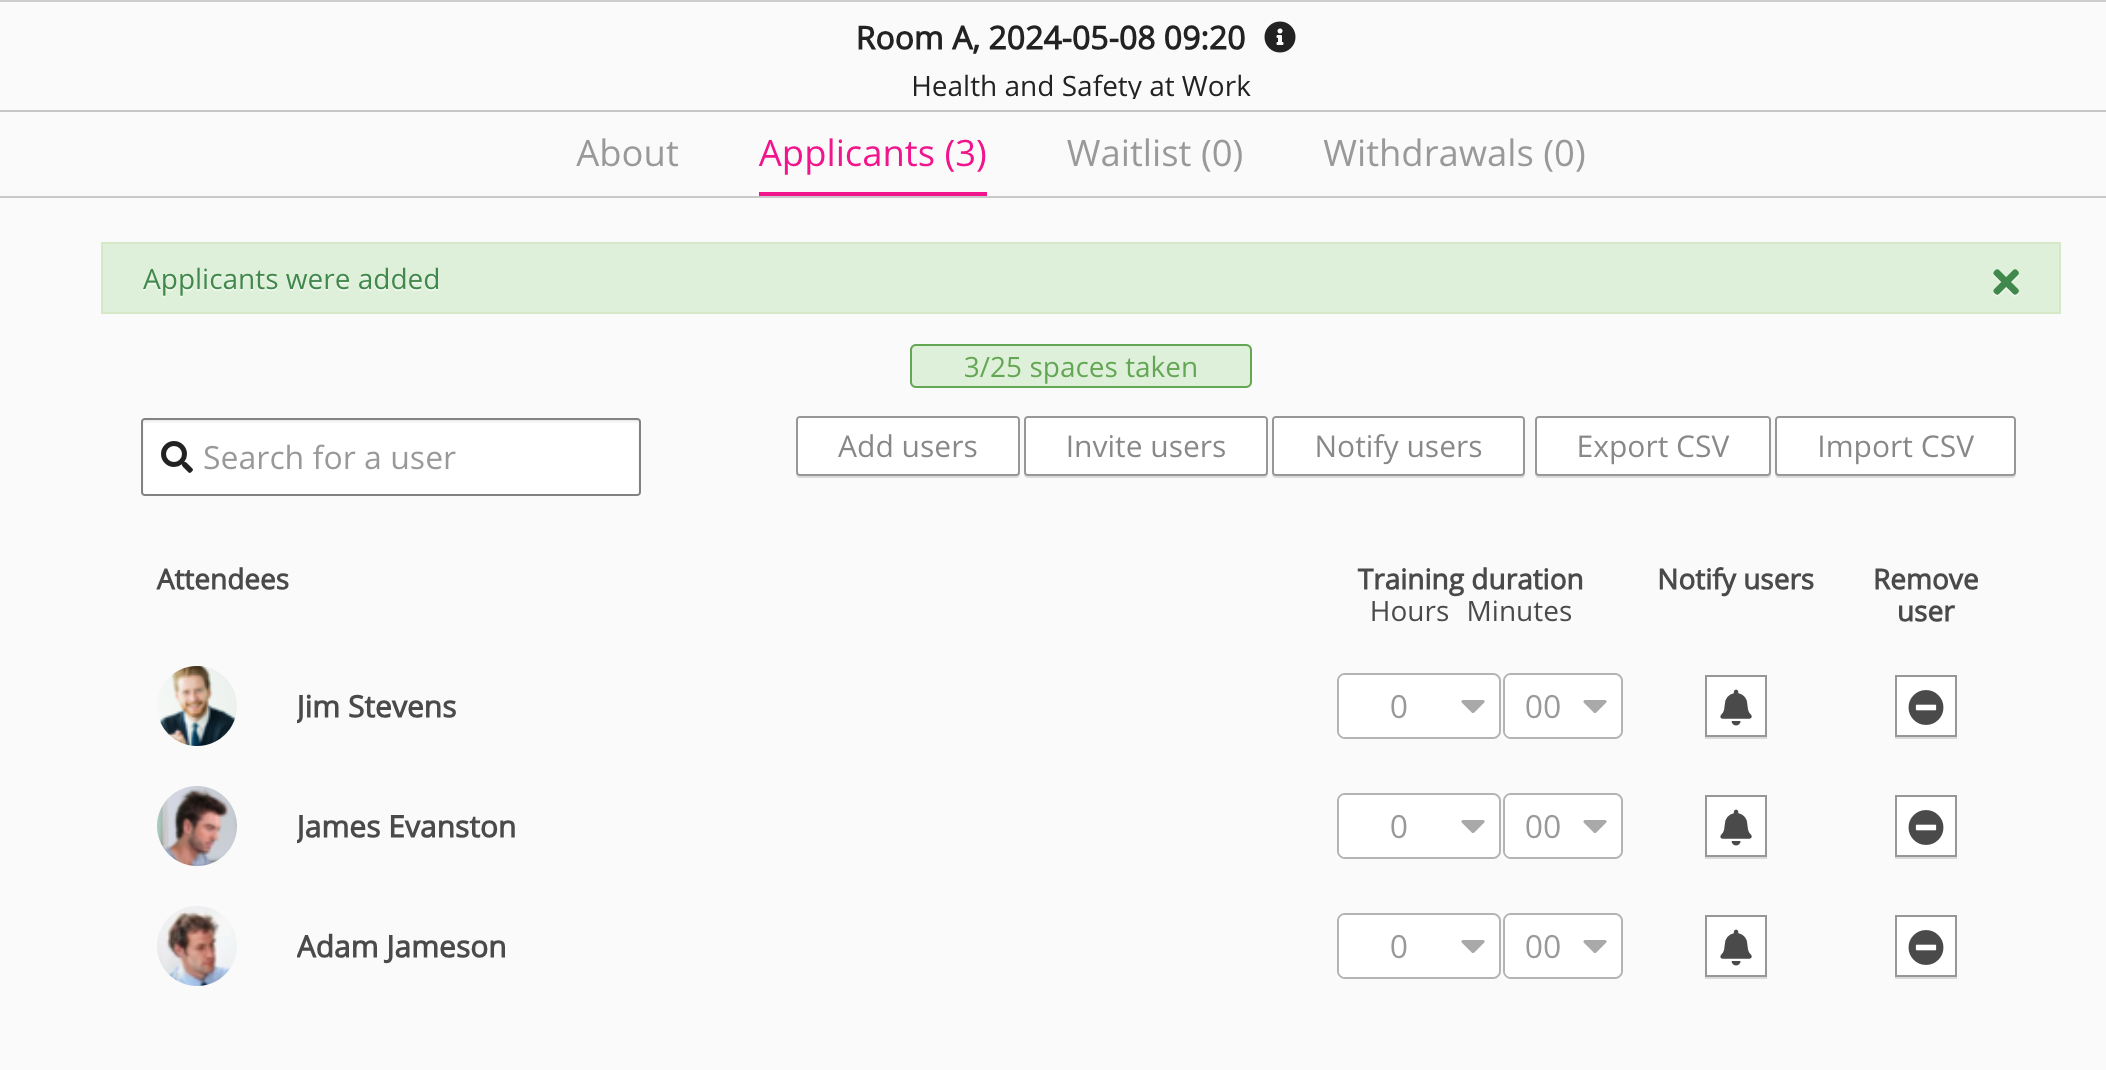
Applicants tab
The Applicants (#) tab allows you to manage registrations to attend the occurrence, including being able to bulk import users to an event using a CSV. The table below lists the available settings, depending on your event configurations.
|
Setting |
Description |
|---|---|
|
Search for a user |
Enter the name of a user to filter the Attendees list. |
|
Add users |
To add users to attend the occurrence:
|
|
Invite users |
To share the occurrence with specific users:
|
|
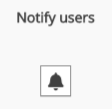
Notify users |
To send a notification to all users on the Attendees list:
|
|
Export CSV |
Click to export information about all users in the Attendees list to a CSV file. |
|
Import CSV |
You can upload a list of attendees to both past and future events using a CSV. Click Import CSV and upload the file from your computer. Fuse does not support CSV files with UTF-8 encoding - it must be a standard CSV file. 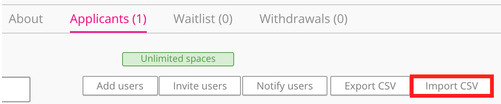
Importing users to past events You can import users to events that have happened in the past, marking them as attended or not. When doing this, the following headers must be included:
You can download an example CSV template here: import users to a past event example.csv 
Importing users to future events You can import users to events that are due to take place at a future date. When doing this, the following headers must be included:
You can download an example CSV template here: import users to a future event example.csv 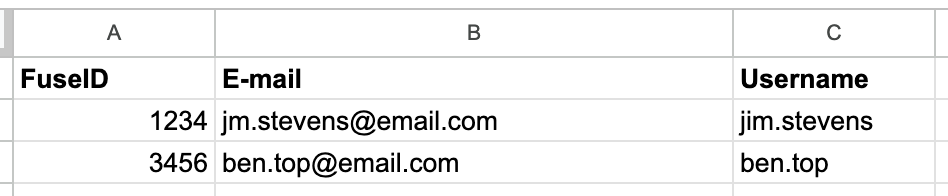
When importing users to both past and future events, the FuseID, E-mail and Username headers must always be included, however, you can choose to only include data for one of these particular columns - leaving the other columns empty. For example, you might only list each user’s username as shown below, leaving the other two columns (FuseID and E-mail) blank, and those users will still be imported to the event successfully: 
A community admin can only import users into an event via CSV if:
Community admins who are part of an admin group, cannot import users into an event, if the Events and Manage Events permissions are enabled on the Admin groups screen. |
|
Event creator / Manager sign off / Specified approver |
If Sign off required is enabled on an occurrence, a column exists for each of the sign-off types enabled on the occurrence. Sign off required is disabled by default and can be enabled under Applicant approval in the Advanced options section of the Creating a new event screen. To approve a registration:
To decline a registration:
|
|
Did the user attend? |
After completion of the event, click one of the following buttons to mark user attendance:
|
|
Training duration |
If the user attended the event, use the Hours and Minutes dropdown lists to specify the amount of time contributed towards training for each attendee. |
|
Notify users |
To send a notification to an individual user:
|
|
Remove user |
To remove a user from the occurrence:
|
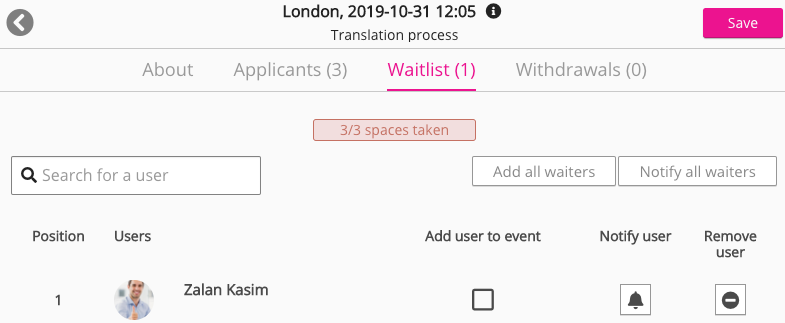
Waitlist tab
The Waitlist (#) tab allows you to manage registrations to attend the occurrence. The table below lists the available settings, depending on your event configurations.
|
Setting |
Description |
|---|---|
|
Search for a user |
Enter the name of a user. |
|
Add all waiters |
To add all waitlisted users to the event: This setting automatically increases the number of spaces to cater towards the waitlisted users being added.
|
|
Notify all waiters |
To send a notification to all waitlisted users:
|
|
Add user to event |
To add individual waitlisted users to the occurrence: This setting automatically increases the number of spaces to cater towards the waitlisted users being added.
|
|
Notify user |
To send a notification to a waitlisted user:
|
|
Remove user |
To remove a user from the waitlist:
|
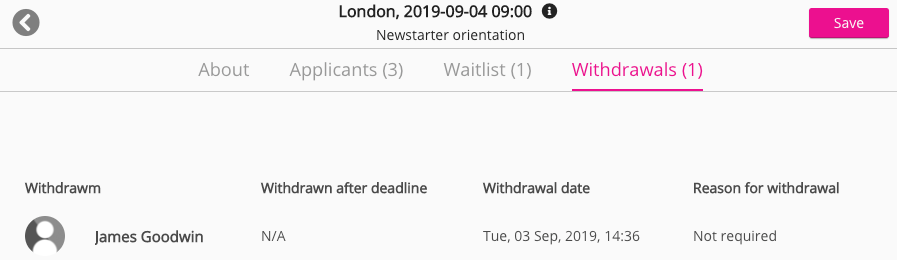
Withdrawals tab
Click the Withdrawals (#) tab to view all users who have withdrawn from the occurrence. The table below lists the information available for each user listed on the Withdrawals (#) tab.
|
Information |
Description |
|---|---|
|
Withdrawn |
Name of the withdrawn user. |
|
Withdrawn after deadline |
Indicates if the user withdrew after the registration deadline passed. |
|
Withdrawal date |
Date the user withdrew. |
|
Reason for withdrawal |
If the user withdrew after the registration deadline passed, they were required to provide a reason for withdrawing. If applicable, the reason is listed here. |