To create a report on the Reporting (Legacy) screen:
For a list of available reports, see Available reports.
-
Click Create new report.
-
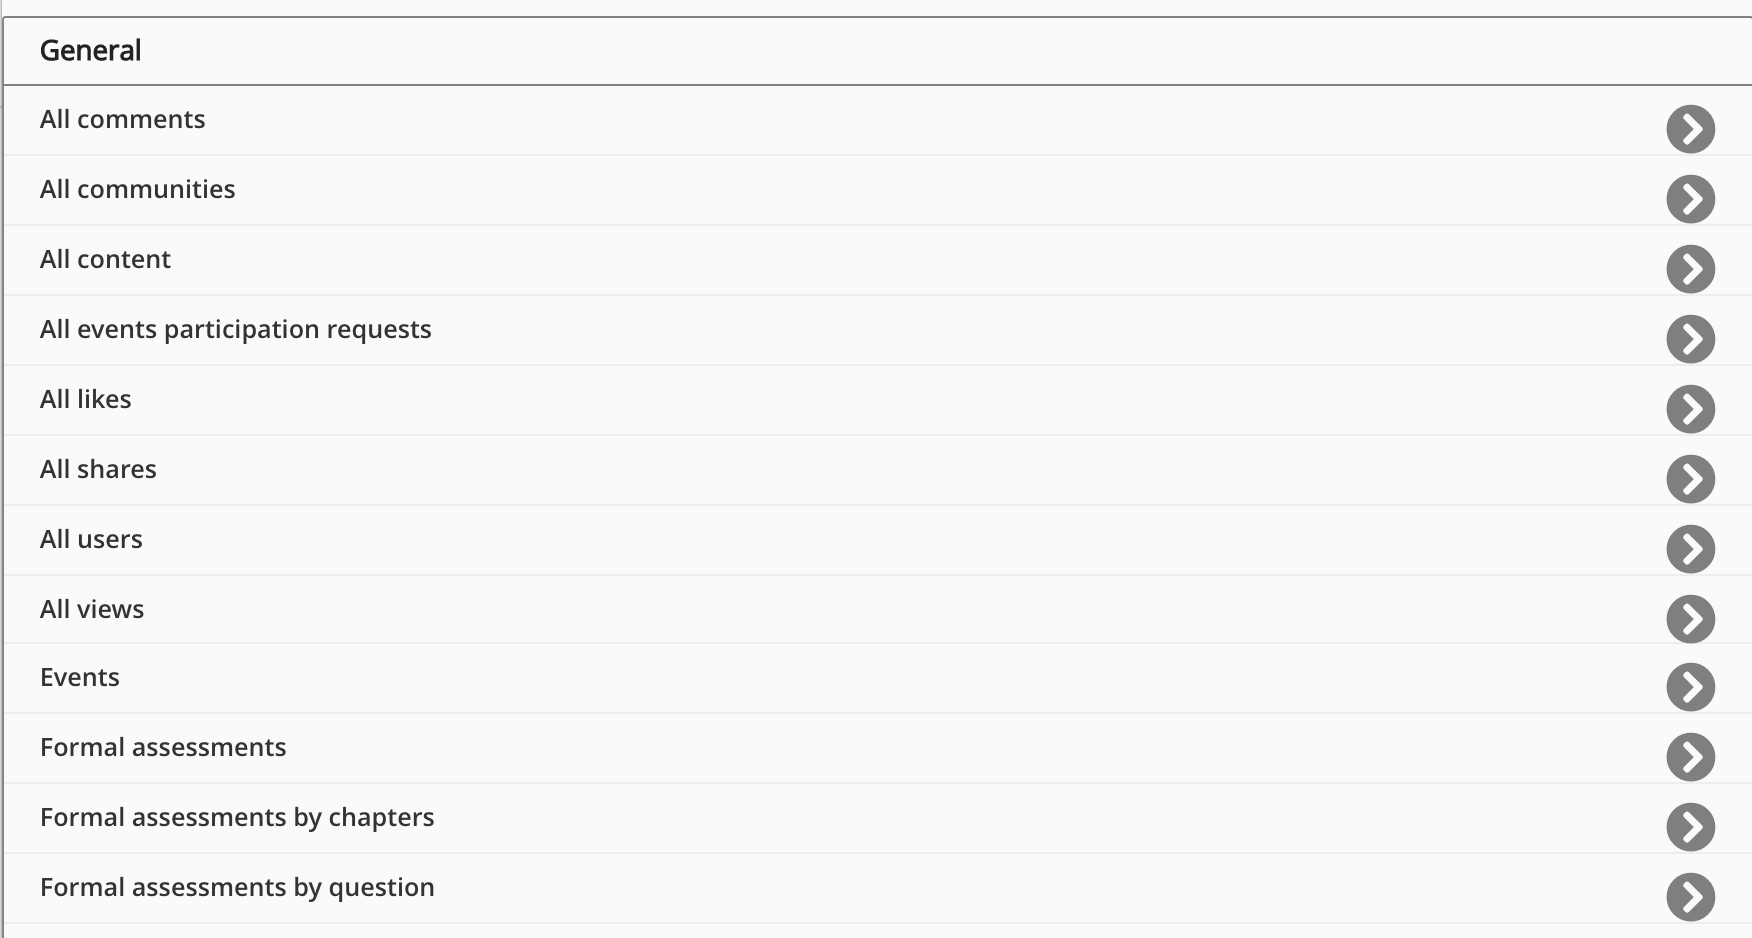
In the General list, select the report type you want to create.
The report configuration screen appears. -
In the Report title (Required) field, enter the title of the report.

-
In the Select a community field, enter the name of a community and select it from the list. The report will display data for users in the selected community only. You can select the Include deactivated users checkbox, if you want to include deactivated users who were once members of this community.

-
Select the date range for the data in the report, from the Start date and End date checkboxes.

-
In the Select fields to include in the report section, you can deselect the fields you do not want to include in the report. All fields are selected by default.

-
[Optional] In the Filter the report (optional) section, you can select profile fields by which to filter the report.
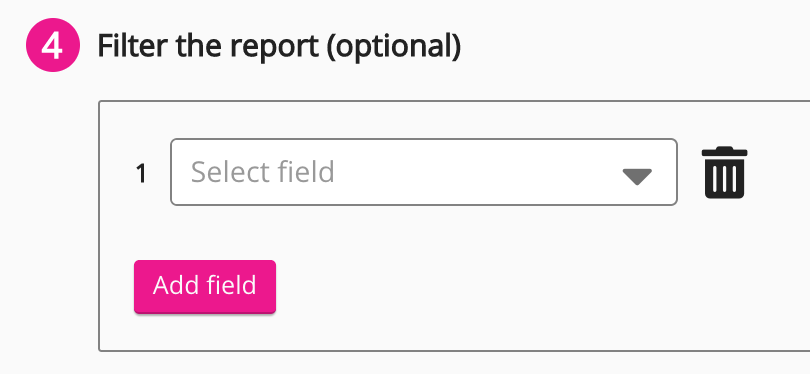
When applying filters, you can choose to filter by a specific term or ID. For example, if you have selected the User ID filter, you can enter a specific user's ID so that the report is filtered to only show data for that user. You can only filter by exact terms. If you enter partial terms, partial or incomplete numerical figures, or partial email addresses (e.g. '@emailprovider.com') the report will fail to filter correctly.
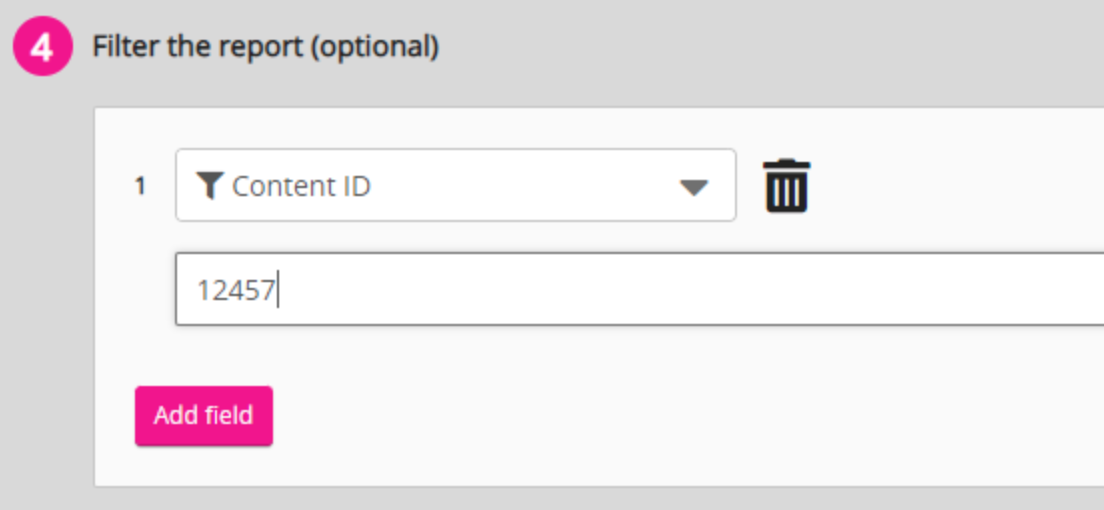
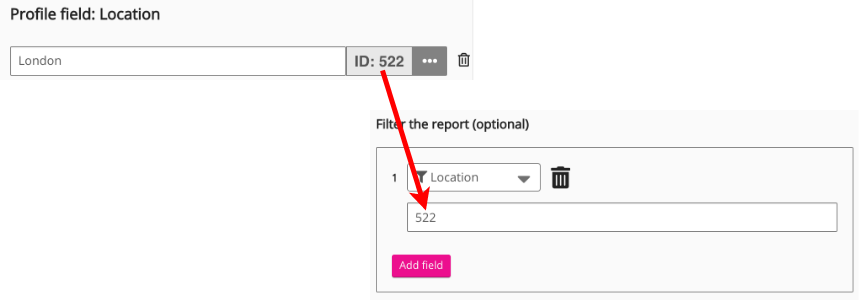
When adding options to filters that reference custom profile fields, you must enter the ID assigned to the option, as displayed on the Profile custom options screen, rather than the option label. For example, if you select the Location profile field, and you want to filter the report to only show users based in London, you must enter the ID for London, instead of entering the option label "London". In the example below, the ID for London is 522. It is important to note that you can only enter one option per filter.
-
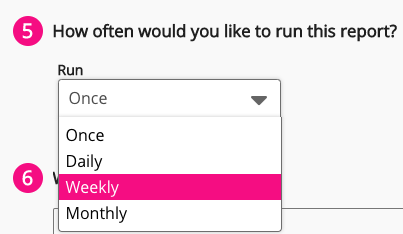
In the Select how often you would like to run the report section, select how often you would like to run the report. For example, you may only want to run the report once, or you might want to run it on a monthly basis to keep track of learning completion for users in the community.
From the Run drop down, select one of the following:
-
Once: The report will run once only.
-
Daily: The report will run once per day.
-
Weekly: The report will run once per week.
-
Monthly: The report will run once per month.
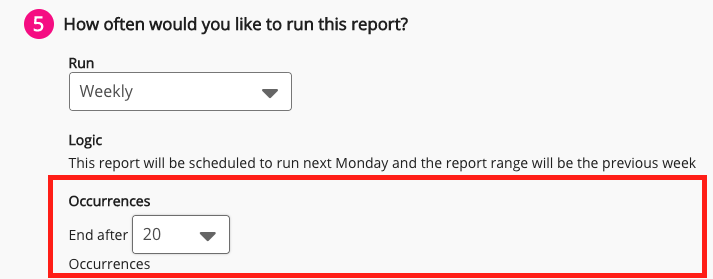
Optionally, if you have selected Daily, Weekly or Monthly, you can stop the creation of the report after a specific number of cycles, by selecting a number from 1-20 in the End after [#] Occurrences dropdown.
For example, if you set the report to run once per month, and you select 5 from the End after [#] Occurrences dropdown, the report is created once per month for 5 months, after which Fuse will stop creating the report.
-
-
In the Who can access this report section, select which users have access to the report. Select from the following options:
Only me: Only you have access to the report. All users: All users in the community have access to the report.Manually add users: Allows you to manually select which users have access to the report. Assign by admin group: Select existing admin groups. -
In the Forwarding (optional) section, you can choose to upload the report to and notify members of selected communities about the report.

-
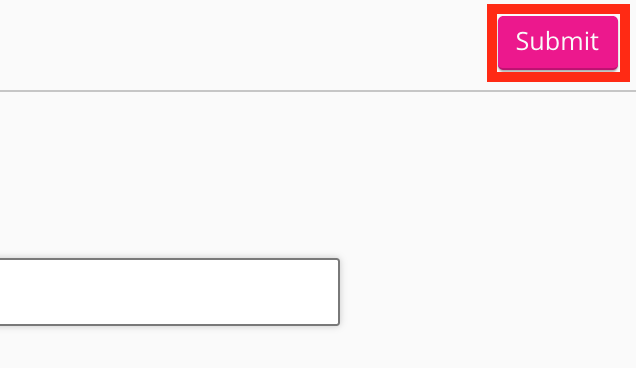
When you have finished configuring the report, click Submit, in the top-right corner of the screen.
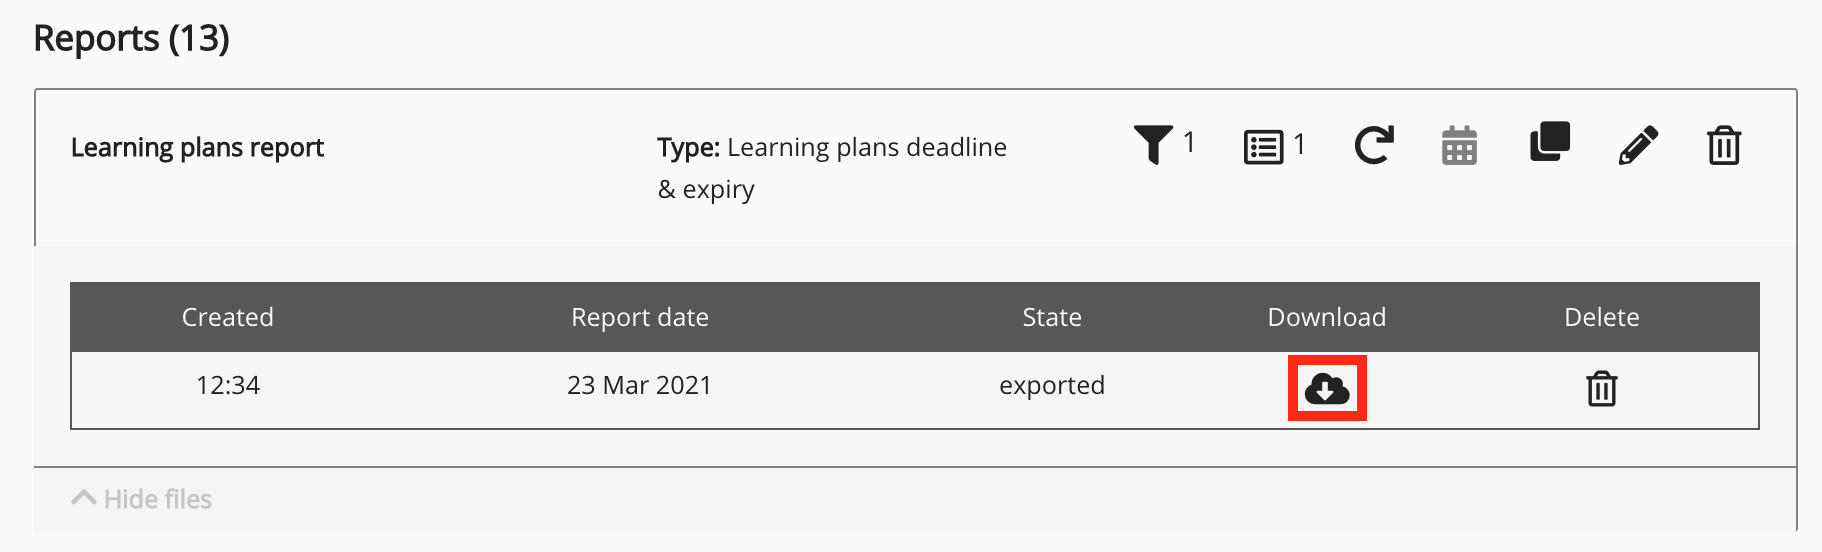
When the report has been generated, it appears in the Reports(#) section, on the Reporting screen, where it can be downloaded.