
The All events participation requests report, lets you generate a list of users who have requested to attend events in a community. You can see each user's name, participant ID and participation approval status, as well as the details for each event, such as the event name, occurrence, date and time.
For example, you might use this report to see how many users were declined for a particular event.
Below is an example of the All events participation requests report:

This section includes:
Configuring the report
The All events participation requests report screen contains the following configuration fields:
|
Field |
Description |
|---|---|
|
Report title (required) |
Enter the title of the report. |
|
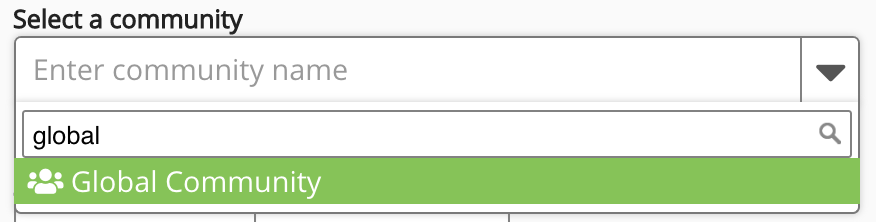
Select a community |
Search for and select the community in which the event was created. To search for and select a community:
|
|
Include deactivated users |
Select the Include deactivated users checkbox to include users who previously existed in the community, but whose accounts have been deactivated. Users are typically deactivated by an organisation when they leave. This checkbox is deselected by default.
|
|
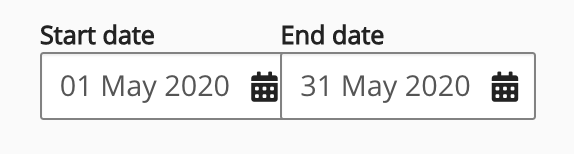
Start date and End date |
Select dates from the Start date and End date calendars. These fields are mandatory and you must select a start and end date before being able to submit the report. For example, you might want to only see data from 1st May 2020 - 31st May 2020. |
|
Select fields to include in the report |
Select data you want to include in the report/deselect data you want to omit from the report. For more information about each of these fields, see the Report specific fields section below.
All checkboxes are selected by default in the Select fields to include in the report section.
|
|
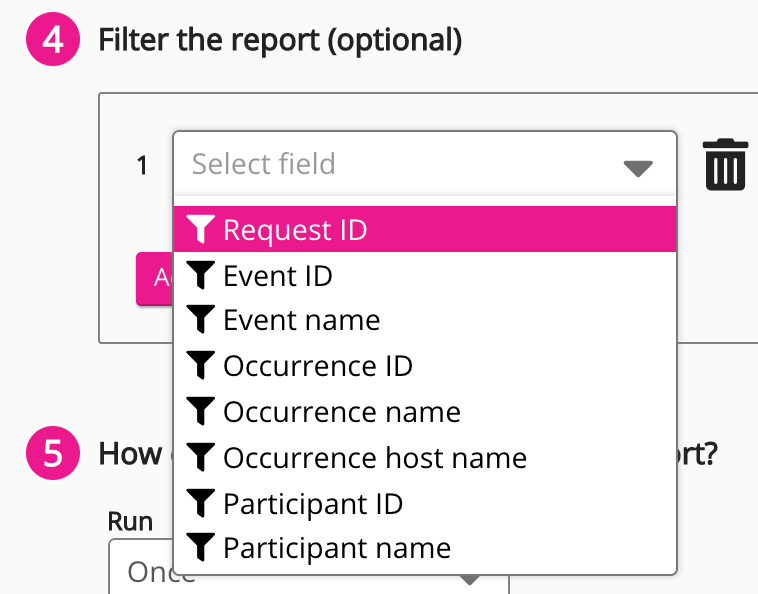
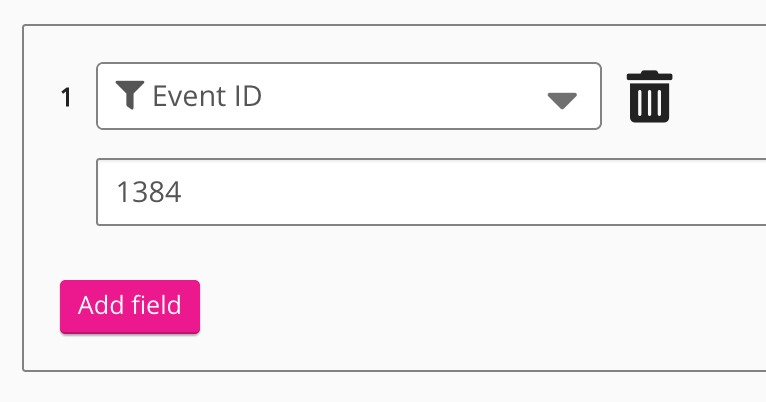
Filter the report (optional) |
Narrow down the data displayed in the report by selecting one or more available filters. For example, you might filter this report by a particular Event ID, so that you only see the participation details for that one event.
|
|
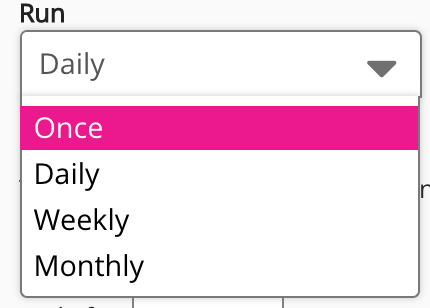
How often would you like to run this report? |
Select how often you would like to run the report. From the Run drop down, select one of the following:
If you have selected Daily, Weekly, or Monthly, you can choose to stop the daily, weekly, or monthly creation of the report after a specific number of cycles, by selecting a number from 1-20 in the End after [#] Occurrences dropdown.
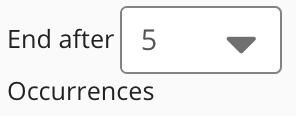
Example: If you set the report to run once per month, and you select 5 from the End after [#] Occurrences dropdown, the report will be created once per month for 5 months only, after which Fuse will stop creating the report.
|
|
Who can access this report |
In the Who can access this report section, specify the users or groups that will be able to access this report once it has been created.
Select one of the following:
|
|
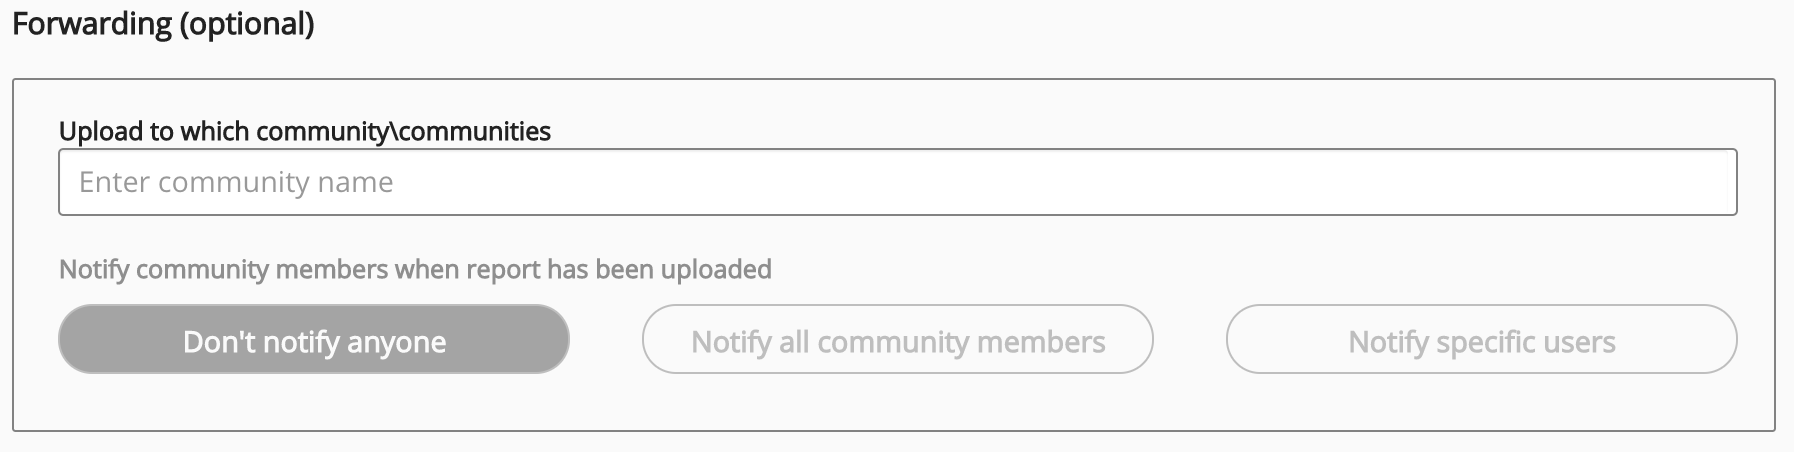
Forwarding (optional) |
Notify selected communities, or community members within those selected communities, once the report is created. Select one of the following:
|


When you have finished selecting the options for the report, click Submit in the top-right corner of the screen, and the report is created.
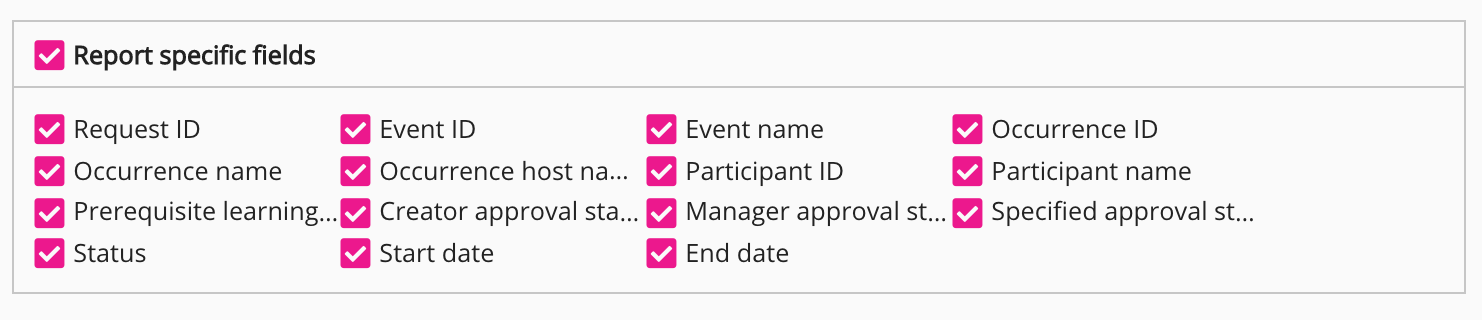
Report specific fields
The following standard Fuse user data can be included or omitted from All events participation requests report:
|
Field |
Description |
|---|---|
|
Request ID |
The event participation request ID. |
|
Event ID |
The ID of the event. |
|
Event name |
The name of the event. |
|
Occurrence ID |
The event occurence ID. |
|
Occurrence name |
The name of the event occurence. |
|
Occurrence host name |
The name of the user who hosted the occurence. |
|
Participant ID |
The ID of the user who applied to participate in the event. |
|
Participant name |
The name of the user who applied to participate in the event. |
|
Prerequisite learning completed |
Whether or not the user completed any necessary prerequisite learning prior to attending the event: The following can be displayed in the report:
|
|
Creator approval status |
Whether or not the event creator approved the user to participate in the event. The following can be displayed in the report:
|
|
Manager approval status |
Whether or not the user's manager approved the user to participate in the event. The following can be displayed in the report:
|
|
Specified approval status |
Whether or not the specified approver approved the user to participate in the event. The following can be displayed in the report:
|
|
Status |
The participation approval status of the user: The following statuses can be displayed in the report:
|
|
Start date |
The date and time the event started. For example, 2021-03-09 10:30:00. |
|
End date |
The date and time the event ended. For example, 2021-03-09 11:30:00. |